Recipe Links
Basil Oglio Fra Diavlo Black Pepper and Fennel Shortbread Crackers Bleu Bacon and Italian Burgers Blueberry Almond Crumble Pie Braised Beef Short Ribs Breakfast Sausage Butter Pecan Shortbread Cookies Buttermilk Pancakes California Grilled Artichokes Capressa Fra Diavlo Cherry Garcia Icecream Cherry Sangria Chicken and Polenta Chicken Cacciatore Chicken Vegetable Soup with Broccoli Rabe Chocolate Cake with Chocolate Ganache Frosting Chocolate Sparkle Cookies Christmas Shortbreads Classic Hummus Coconut Cake Coq Au Vin Wine Braised Chicken Cranberry Orange Crumb Cake Cream Corn and Lima Bean Succotash Devishly Chewy Brownies Eggplant Parmesan Fetticini Alfredo with Bacon and Peas Fusilli a la Vodka Sauce Ginger Chocolate Spice Cookies Gnocci with Broccoli Rabe and Sausange Gramma Daly's Cole Slaw Grilled Beef Tenderloin with Blue Cheese Butter Grilled Swordfish Hazelnut Biscotti Cookies Heavenly Blondies Homemade Italian Sausage Homemade Sauerkraut Hot Artichoke Dip Italian Meatballs Little Sister's BBQ Ribs Molten Chocolate Cake Olio fra diavlo pasta salad Pumpkin Gingerbread Cake Quiche (Sans the Lorraine) Red Velvet Cake Seafood Francaise Shaved Brussel Spouts & Polenta Cake Slow Cooker Thai Pork and Coconut Rice South Florida Fish Stew Spagetti ala Olio Aglio and Pepperoncino Spiced Pear and Cranberry Chutney Steak Braciole Sunday Tomato Sauce Sweet Potato Corned Beef Hash Swordfish Oreganade Teriyaki Pork Tenderloin and Spicy Thai Peanut Sauce The White House Maryland Crab Cakes Tomato Bisque with Chichen and Rice Turkey Paprikash Soup Walnut Shortbread Christmas Cookies White Bean Pasta Fagioli

Better ingredients, better technique, better results.

Entries by Margot (70)

Sunday
Dec112016

Cranberry Orange Crumb Cake

I have to admit that although I used to love the original recipe from my Great Grandmother, she used lard and milk, and over time I have modernized this recipe with butter and sour cream.  The result is a tender moist crumb vs the very fine dry crumb from her recipe.  She also made hers very plainly, but when you have leftovers, why not use them?  If you don't have Orange extract, substitute Vanilla extract or 2 Tbs Orange juice and cut the sour cream by 2 Tbs.

Ingredients: 

For the crumb topping
1/4 cup granulated sugar
1/3 cup light brown sugar, lightly packed
1 teaspoon ground cinnamon
1/8 teaspoon ground nutmeg
1/4 pound (1 stick) unsalted butter, cut into 1/4 inch cubes
1 1/3 cups all-purpose flour
1 Tbs Orange Zest
  • Put all of the ingredients, except for the butter, into the bowl of a food processor fitted with the knife.
  • Pulse a few times to combine the dry ingredients
  • Add the butter cubes, spreading them out around the bowl
  • Pulse the knife until the mixture resembles large crumbs and set aside


For the cake:

6 tablespoons unsalted butter, at room temperature (3/4 stick)
3/4 cup granulated sugar, plus 2 Tbs for the cranberries
2 extra-large eggs, at room temperature
1 teaspoon pure Orange extract
1 Tbs grated Orange zest
2/3 cup sour cream
1 1/4 cups all-purpose flour
1 teaspoon baking powder
1/4 teaspoon baking soda
1/2 teaspoon kosher salt
1 cup fresh cranberries
  • Preheat the oven to 350 degrees F. Butter and flour a 9-inch round baking pan.
  • Cream the butter and sugar in the bowl of an stand mixer fitted with the paddle attachment on high speed for 4 to 5 minutes, until light. 
  • Reduce the speed to low and add the eggs 1 at a time, then add the vanilla, orange zest, and sour cream. 
  • In a separate bowl, sift together the flour, baking powder, baking soda, and salt. With the mixer on low speed, add the flour mixture to the batter until just combined. 
  • Mix the cranberries with 2 Tbs of Sugar to coat, then fold into the batter until it is mixed.
  • Spoon the batter into the prepared pan and spread it out evenly. 
  • Using a fork, sprinkle the crumb topping evenly over the batter. 
  • Bake for 40 to 50 minutes, until a cake tester comes out clean.
Monday
Dec052016

Christmas Shortbreads

Ingredients:

2 sticks cold, unsalted butter
½ cup plus 2 TBS sugar
2 ½ cups flour
1 tsp salt
Cooking spray with flour
8 oz. good quality chocolate bar
  • Pre-heat the oven to 300 degrees.
  • Place the flour, sugar and salt in the bowl of a food processor and with the knife, mix the ingredients with a few pulses
  • Cut the butter into cubes or slices and sprinkle around the flour mixture in the food processing bowl
  • Pulse in the butter until the mixture starts to come together, but not quite into a ball (unless you are going to roll the dough and make cut-outs)
  • If you have a shortbread mold (as the one pictured), spray with a cooking spray that also has a flour mixed in it.  I have tried using melted butter, and it just doesn’t get into the grooves as well, and the pattern doesn’t show up on the cookie quite so well.
  • If you don’t have a mold, just use a metal brownie pan or round cake pan
  • Empty the dough into the mold or pan, spread out the crumbs, and using your fingers, press the dough into the mold until it is one uniform layer.  Make sure you press out any seam or cracks as these will crack once the cookies are finished.
  • If you want to roll the dough into cut-outs, process the dough until it comes to a ball, then roll out the dough on a lightly floured work surface and cut out your cookies into shapes, and place on a cookie sheet.  They will take only about 20-25 minutes.
  • Bake for about 1 hour, until the top of the dough begins to turn golden brown
  • Remove from the oven and allow to cool completely in the pan
  • Once cooled, invert the pan and rap it down against a wooden board (don’t break your granite counter!) until the cookies release.  They should release in a single layer
  • Carefully turn the cookie over, and gently score with a knife along the pre-formed edges
  • The cookies can be served as is, or gently dipped into melted chocolate and turned upside down to allow the chocolate to set.  If you are serious about the chocolate, I would do some look-up on-line about how to melt chocolate so that it stays in temper.  I admit I am not a chocolate expert, sometimes it works, sometimes it doesn't!
Friday
Nov182016

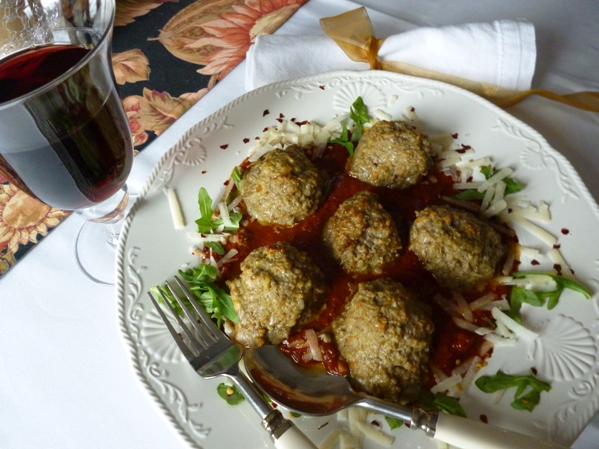
Italian Meatballs

You can substitute just beef, dried oregano, pre-grated cheese food, prepared bread crumbs and/or sauce out of a jar, but it won't be the same result.  You do need a food processor to get a soft, cake-like consistancy for your meatballs. You can do it manually, but its difficult to get the vegetables and bread crumb cut really small.  I usually have a quart or two of sauce I pre-made in the freezer.  Its very simple to make, it just takes non-active simmering time, but I guarantee it is not only cheaper than anything out of a jar, you will never get this taste out of a jar.  This recipe will make about 3 dozen meatballs, so I use about 12-15 for 4 servings, and freeze the rest in a gallon freezer bag for future use.

Meatballs:

3 lbs ground beef and pork (ideally, ground together)
1 large sweet onion
2 medium sized carrots
4 stalks celery
6 cloves garlic
2 tbs fresh oregano
1/4 pound reggiana parmegeana cheese
3 jumbo eggs (4 if another size)
3 cups fresh breadcrumbs
2 Tbs olive oil
Salt & Pepper
1 quart marinara sauce


  • If you run these ingredients through the food processor in this order, you won't have to wash it bowl in between steps.
  • If you have not already made the bread crumbs, take a loaf of good quality country style bread, cut it into chunks and run it through a food processor until you have very fine bread crumbs.  Freeze what you don't use for this recipe.  Put the bread crumbs into a large bowl.
  • Cut the cheese into 1 inch pieces, and run through the food processor until you have finely grated cheese.  Add to the bread crumbs.
  • Scrub or peel the carrots, take the ends off, cut into 1 inch pieces and put into the food processor bowl with the knife.
  • Add the peeled garlic cloves
  • Cut the onion into large chunks and add to the bowl
  • Cut the celery into large chunks and add to the bowl
  • Add the fresh oregano leaves to the bowl
  • Run the knife until you have very small, very minced vegetables.  


Sunday
Nov132016

Shaved Brussel Sprouts & Polenta Cake

The original dish was with something called a Fontina Cake, and it took me a little while to figure out what it really was:  basically, flattened Arancini balls.  Since I had already made the polenta the day before, I went ahead with it.  Not sure the Arancini is worth the effort, this was just as good.  Maybe some day, when I happen to have some leftover risotto that I made with no other flavorings, i'll try it that way.  If you want to, just look up Arancini on any food site and go with whatever your favorite chef says.  Just make into patties instead of balls, and serve with the brussel sprout salad. This half recipe of hard polenta will make 6 servings.  My mother used to stand over a hot pot of liquid, sprinkling the polenta in every so slowly, and then stood there another 45 minutes, stiring constantly while it cooked.  (Actually, she made me do it.)  Then one day she figureded out an easier methods, and its been mine ever since.  Thanks, Nan.

Make the Polenta:

1-1/4 cup polenta meal
1-1/2 cup mile
1 cup water
1 tsp salt
4 oz fontina cheese, shredded
1/2 cup fine breadcrumbs

  • Add the water,  mile and salt to a small sauce pan and stir
  • Using a whisk, add the polenta to the liquid while it is cold and whisk
  • Turn the heat on to medium, stirring every minute or two until the polenta meal starts to cook.  Once it starts to boil, turn it down to very low, stiring every five m inutes and let it cook until somewhat stiff, about 45 minutes
  • Add the shredded fontina cheese
  • Pour about 1 Tbs EVOO into into 3 ramikans, pour in the hot polenta cover with plastic wrap and refridgerate overnight.  If you are going to double the recipe for a larger crowd, pour the polenta into a single oiled loaf pan instead
  • Next day, preheat your oven to 400
  • Run a spatula around the edge of the dish or pan, invert and turn out the polenta.  Slice the rounds in half, or cut the loaf into slices about 1 inch thick
  • Place the slices into a bowl with the bread crumbs, turn and pat the crumbs into the cake
  • Place on a baking sheet, and bake about 15 minutes, turn and bake another 15 minutes

Make the Brussel Sprout Salad

10-12 large brussel sprouts
2 Tbs Cooked, crumbed bacon (optional)
2 Tbs toasted pine nuts (optional)
2 oz chunk of Reggiona Parmesana cheese
2 Tbs EVOO
2 Tbs White Truffle Oil
2 Tbs champagne or white balsamic vinegar
1/2 tsp dijon mustard
1/2 tsp salt 
1/4 teaspoon white pepper

  • Cut the brussel sprouts nearly in half and discard the root end
  • Cut the cheese into 1/2 inch pieces
  • Place the sprouts, cheese, bacon and nuts down the feed tube of your food processor, fitted with the slicing blade on its thinnest setting, slicing into the bowl. Remove to a medium bowl.
  • Whisk the remaining ingredients together to make the dressing.
  • Toss the sprouts with the dressing, and pile on top of the polenta cakes.
  • Drizzel a little extra truffle oil to serve.
Sunday
Nov132016

Dry Brined Sage Roasted Turkey in Parts

For the bird:

20-22 pound turkey, cut into parts, back bone removed
2 sticks unsalted butter
3-4 Tbs kosher salt
2-3 Tbs ground black pepper
6 Tbs finely chopped fresh sage

  • Melt the butter in a small saucepan, then add the remaining ingredients.
  • Using a pastry brush, brush each of the turkey parts and place in a large pan you don't intend to roast in.
  • Cover with plastic wrap and refridgerate for about 22 hours
  • About 2 hours prior to roasting, take the turkey out of the refridgerator, unwrap the plastic and place in the roasting pan you plan to use.  Try to space the parts for more even cooking and browning.  Two pans might be necessary, just rotate the pans halfway through the cooking process.  If you have a convection oven, even better, and you can also put the dark meat in one pan and the breast in another pan, taking one pan out when the tempurature is correct.
  • Preheat the oven to 450, and when at tempurature, put the turkey parts in the oven and roast for 15 minutes on high.  If you have two pans, roast them separately.
  • Turn the oven down to 325 and return both pans to the oven.
  • I roast the breast until about 180.  Most recipes call for 160, but we just like our bird done.  The brining helps the meat from drying out.  For the legs, about 170.  With the meat separated into white and dark, you can cook each to perfection.
  • Rest, lightly covered with foil, for at least 15 minutes.  Your resting time will also be shorter than normal because your parts are smaller.

Turkey Stock

Have your butcher cut up your bird, keeping the neck and the backbone for stock.  I usually get my bird two days before, allowing me to roast the neck, backbone and even the wings in the oven, the day I bring the bird home, so I can make my stock that day, and allow to cool overnight and skim.  That gets me to Wednesday the day before, and I have stock ready to go for both the gravy and the stuffing.

Cooked parts of Turkey, leftover carcass from a previous meal, roasted back-bone, neck or wings as long as they are already cooked
1 sweet onion, cut in half, gritty root end cut off
2-3 stalks celery, gritty bottoms cut off
2-3 carrots, scrubbed, gritting tops cut off
3 whole garlic cloves, smashed
2 bay leaves

  • Place all of the ingredients in a large (12 quart if you have it) stock pot, cover with water, bring to a boil, and then keep on a low boil for 2 hours.
  • Strain out all of the solids and discard
  • Let the stock cool down for a couple of hours, then refridgerate overnight
  • Skim the fat off stock prior to using.  Freeze in 1 quart containers for convience
  • Use this stock for both your gravy, stuffing baked separately, and your turkey soup with the leftovers you will have because you cooked an enormous bird in parts.
Sunday
Nov132016

Thanksgiving Decontructed Again

I've really learned to stick with my Thanksgiving plan from 2 years ago, and this year, I did a trial run on one further deconstruction technique:  Turkey in parts.

Every cooking magazine out there has some version of how to roast your turkey so the breast doesn't dry out before the legs and thighs are done.  You can find turkey in parts in many grocery stores this time of year, and for my trial runs, that's what I bought.  But for the actual meal, I bought a heritage bird and had my butcher cut up the turkey for me.  For a 20-22 lbs stuffed bird, normal cooking time would be nearly 7 hours.  For a cut-up bird, depending on arrangement of the parts, between 2 and 3 hours, depending on your oven tempurature.  I like mine to cook at 325 for a bit longer, which might push your cooking time to 3 hours, but if you need to shorten the time further, cook at 350, and brine your bird.

Brining not only makes your meat more juicy and tender, it also reduces the cooking time.  For best results, use a meat probe that sits outside the oven (See Thanksgiving Decontructed).  I've done a wet brine turkey before, and accidently let the bird brine too long (24 hours)  the result was more like ham and very salty. Wet brines should only be done for about 18 hours, vs 24 hours.  So you have to be very specific about when you start your brine.  I prefer a dry brine method, because it allows you a little more flexibility.  You can go the full 24 hours without a salty result, and frankly its easier to calculate your brining time.  

I like sage with turkey, so I keep my brine very simple.  Sage, butter, salt & pepper.  And that brine also makes a very simple, but deeply flavored gravy, especially if you use your own home-made stock.  So, Dry-Brined Sage Roasted Turkey in Parts.  Pictures will be coming soon!

Monday
Sep052016

Grilled Beef Tenderloin with Blue Cheese Butter

The secret to a perfectly crusted steak:  a flat, stainless steel grill pan.  I go through about 2 of these every season.  They are perfect for steak, burgers, fish, and vegetables because there is more surface contact creating an even crust, and you don’t run the risk of losing your dinner through the grates.  Get it screaming hot.
For each person:
8-10 oz. Tenderloin Steak
1 strip bacon
1 Tbs unsalted butter
1 Tbs (about 1 oz.) blue cheese
2 tsp Worcester Sauce
Olive Oil, salt & pepper for grilling the steaks
  • In a small bowl, in the microwave, melt the butter and the blue cheese until soft.  Stir in the Worcester sauce.  Refrigerate until ready to use.
  • About 1 hour prior to cooking, season each steak on all sides with salt & pepper and allow them to come to room temperature.
  • Pre-heat the grill and the grill pan for at least 10 minutes on the highest setting your grill has, with the cover closed
  • Brush the steaks with olive oil set them on the grill pan.  Close the lid.  Once you have put them down, do not move them for 4 minutes.  This is what creates the crust.
  • Brush the top side again with olive oil, turn the steaks and close the lid.  Do not move them for 4 minutes.
  • At this point, you probably have medium rare steaks.  I use the touch method. If the middle of the steak is still very soft (just touch it with your tongs), it’s rare. The firmer the meat feels in the middle, the more the steak is cooked.  We like our more in the medium range, or very pink.  
  • Depending on the thickness of your steak, you may need to cook it a bit longer. Move the entire grill pan over to one side of the grill, turn off the burners under the pan, and close the cover.  This will give you an oven temperature of about 400.  Leave the steaks for another 3-4 minutes for medium.
  • Take the steaks off, and loosely cover them with foil for about 5 minutes.  
  • Spoon the blue cheese butter on top of the steaks, and serve.
Sunday
Dec202015

Italian Meatballs

This recipe makes about 22 meatballs.  Yes, it’s a bit of work, but the result is a sublimely textured and flavored meatball.  Best if simmered in tomato sauce after it’s baked.  I usually ask a butcher to do a custom grind for me of equal parts beef, pork and turkey, but you can add veal instead of the turkey if you like veal.  A food processor and a stand mixer are critical to getting the right texture for all of the ingredients.  If you prep the ingredients in the right order, you only have to clean the food processor once at the end, instead of between each of the ingredients.

Ingredients: 

2 lbs. ground meat
2 large sweet onions
4 stalks celery
4 cloves garlic
½ teaspoon red pepper flakes
1 tbs. fresh oregano
4 tbs. extra virgin olive oil
2 jumbo (3 extra large) eggs
1/4-1/2 pound Parmigiano-Reggiano cheese
½ loaf of Italian, Ciabatta or home style white bread
Salt & Pepper


Prepare all of the ingredients:

  • Cut the cheese into approximately 1 inch chunks.   With the knife blade inserted, turn the food processor on (not pulse), and drop the chunks into the bowl through the feeding tube.  Process until the cheese is very finely chopped.  Empty into a large bowl.
  • Cut or tear the bread into 1-2 inch pieces, dump into the food processor bowl with the knife and process until the bread is very finely chopped.  Empty into a large bowl.
  • Add a teaspoon of salt, and xix the bread crumb and cheese together.
  • Crack the eggs into a small bowl and whisk together.  Add this to the bread crumb and cheese and mix it together.
  • Peel the garlic cloves, and drop them into the food processor with the knife.
  • Chop the celery and onions into 1-2 inch chunks and drop them into the food processor with the knife.  Process until the vegetables are very finely chopped.  They will get a bit watery.
  • Chop the oregano.
  • In a large sauté pan, add the olive oil, and when it heats, add the oregano and the red pepper flakes, making sure you are ready to stir quickly, and then add the vegetables immediately, stirring up the garlic and herb so it doesn't burn on the bottom of the pan.
  • Sauté the vegetables until they are just finished releasing their liquid.
  • Add the vegetables to the bowl and mix thoroughly.

Make the meatballs:

  • Put the meat into the stand mixer with the mixing blade, and add the vegetables.
  • Very slowly, a few pulses at a time, until the meat and vegetables are thoroughly combined.  
  • Using an ice cream scoop (approximately 2-1/4 inch size), scoop the meatballs onto a low sided tray, spacing them evenly.  A standard aluminum tray should hold the entire batch.
  • Bake at 375 for about 45 minutes, until the meatballs are golden brown on the top.  No need to turn them, you won’t see the browning in the sauce anyway.
  • Let them cool, and freeze if you want them for a future purpose, or simmer them in tomato sauce if you can’t stand to wait.  You can use a good quality marinara sauce out of a jar, your grandmother’s long simmered Sunday Sauce, or a quick marinara sauce you make yourself.
Wednesday
Aug052015

Blueberry Almond Crumble Pie

The components of this dessert are versatile beyond just the pie.  The filling can be used for any dessert calling for “canned” pie filling, and cherries work equally well in this recipe. For the blueberries, just rinse, drain and pick them over.  For the cherries, they need to be stemmed, pitted and sliced in half.  I know.  Lots of work.  Don’t wear white.  The filling could also be used with just the topping as a crisp or with your favorite cobbler batter.  Just butter and flour the bottom of the baking dish, add the fruit, top and bake about these same time as the pie, maybe a little less.  This makes an 8” pie, with crust leftover.  

Crust:

3 cups all-purpose flour
½ teaspoon salt
1 teaspoon baking powder
12 tablespoons (1-1/2 sticks) cold, unsalted butter, cut into ½ cubes
3 extra large eggs

Filling:

2 pints blueberries or cherries
¾ cups sugar
3 tablespoons cornstarch
3 tablespoons water
1 teaspoon finely grated lemon zest
½ teaspoon ground cinnamon
¼ teaspoon freshly grated nutmeg
2 tablespoons unsalted butter
1 ½ teaspoons pure almond extract

Topping:

2/3 cups all purpose flour
½ teaspoon salt
4 ounces (about ¾ cup) crumbled almond paste
¼ cup (1/2 stick) cold, unsalted butter, cut into ½ inch cubes

Make the Filling:

Combine 1 cup of the blueberries or cherries with the sugar in a non-reactive saucepan.  Bring to a simmer over low heat, stirring occasionally, until the sugar is melted and the mixture becomes liquid, about 5 minutes.
Combine the cornstarch and the water in a small bowl and whisk until smooth.  Stir into the blueberry and sugar mixture, stirring constantly, until the mixture comes to a boil.  Continue to cook the mixture until it the liquid becomes clear.  Add the remaining blueberries, lemon zest, nutmeg, cinnamon and stir in.  Add the butter and the almond extract at the very last minute, and stir in until the butter is melted.  Pour into a bowl and cool uncovered.  Then cover and chill in the refrigerator until ready to use.

Make the Topping:

Pulse the flour and the salt in a food processor 10 seconds, until combined.  Add the almond paste and cold chunks of butter, and pulse until the mixture is course, and about the size of peas.  Set aside, or make in advance and store in the freezer or refrigerator.

Make the Crust:

In a food processor, pulse the dry ingredients together until combined.  
Add the butter, and pulse until the mixture is uniformly coarse and resembles small peas.  Add the eggs to the work bowl and pulse until the dough comes together into a ball.  Remove the knife from the bowl, and turn the dough ball onto a floured work surface and shape into a disk.  Wrap in plastic and allow to chill and rest, if that is your preferred method, before rolling out.  I prefer bring it to room temperature if I have made it in advance as it’s softer and tends to crack less.  Roll from the middle out, turning the dough to allow a little flour to get underneath so it doesn’t stick to the surface.  When you have round approximately 10” in diameter (hold your pie plate over the disk to measure), roll the dough over your rolling pin and then unroll onto the pie plate.  Press lightly with your fingers along the bottom and sides.  Form a 1/2” ridge along the rim of the pie plate with your fingers, and then crimp the edges. 

Assemble and Bake:

Set your rack to the middle of the two thirds oven.  Preheat to 350.  Pour the cooled filling into the bottom crust.  Sprinkle the crumbled topping over the filling.  If you wish, cover the edges of the crust with strips of foil to prevent burning.  Bake 55-60 minutes, or until you see the filling bubbling up through the crumble topping.  Remove and cool the pie on a rack.
Serve with the best vanilla ice cream you can get your hands on.


Saturday
Mar142015

Gramma Daly's Cole Slaw

This is the simplest of recipes, with only five ingredients, and a minimum of fuss.  If your knife skills aren’t the best, you can use a grater, your food processor, or even purchase pre-shredded cabbage, but that would be my last resort.  You can toss the dressing with the cabbage in advance if you wish, as the amount of vinegar is not enough to make it wilt, but we prefer this toss just before serving.  The result is a creamy, crunchy slaw unlike anything you will find in a restaurant (with the exception of Lenny and Joe’s Fishtale).  I like to make this when the cabbage is tender, which I judge by how heavy the head feels in your hand when you hold it.  For a side with a Rueben Sandwich, I substitute caraway or fennel seed for the celery seed.

Ingredients

1 large head green cabbage
1 cup mayonnaise (I use Hellman’s)
2-4 tsp sugar
2-4 tsp cider vinegar
2 tsp whole celery seed (or caraway), slightly ground with a mortar and pestle.

Quarter the head of cabbage, and then slice each quarter, staring from the pointed top, and cut across, into 1/8th inch shreds.  Remove any of the core and place the shredded cabbage in a bowl large enough for tossing.

In a smaller bowl, add the mayonnaise, 2 tsp of sugar, and 2 tsp of vinegar and wisk.  Now taste it.  If it doesn’t taste “right” add an additional 1 tsp sugar, and 1 tsp vinegar and wisk again.  Taste it again. 

Repeat this until its right.  You will know, trust me.  I have taught this method to many of my friends, and they always get it right. 

Add the partially crushed celery seed and mix.  At this point, you can let the dressing sit in the refrigerator until you are ready to toss.

Add about half the dressing to the bowl and toss.  Keep adding the dressing by half until the cabbage is evenly and fairly heavily coated. 

Serve immediately, or let it keep, refrigerated, for a couple of hours.  We’ve kept the leftovers for another day, and it holds up fairly well, but not much after that.

Saturday
Mar142015

Homemade Sauerkraut

The amount of cooking time is completely up to you.  My rule of thumb is this:  if the green cabbage is lightweight, it will be tender and could be eaten raw, or just cooked until it starts to wilt.  If the head of cabbage is heavy in your hand, it will be dense and slightly tougher, so I will cook it until it’s caramelized.

Ingredients:

2 strips bacon, diced
2 Tbs olive oil
2 cloves garlic, minced
1 tsp caraway seed, slightly ground or crushed.
1 sweet onion, diced
1 very large head green cabbage, cored and shredded
¼ cup apple cider or sherry vinegar

In a large sauté pan with a cover, render the bacon until it begins to crisp. 

If you have a mortar and pestle, use it to slightly grind the caraway seed.  When the bacon begins to crisp, add the olive oil and let it heat through.

Add the caraway seed and the garlic and sauté for one minute.

Add the onion, toss to coat in the oil, and let the onions sauté until they begin to color.

Add the shredded cabbage and toss to coat in the oil.  Let the cabbage sauté until it begins to color (or caramelize, your choice).

Once the cabbage is cooked to your liking, add the apple cider vinegar and cover the pan.

Allow the cabbage to steam for about 10 minutes. (If I am cooking this dish in advance, I turn the heat off and cover the pan.) 

Take the cover off, stir the cabbage around until the pan is “de-glazed” meaning all of the sticky brown mess is now incorporated into the cabbage.  Turn the heat back on, and let it sauté for another 5-10 minutes of cooking time just before serving.  

Friday
Feb272015

Sunday Tomato Sauce

I checked three different classic Italian cookbooks, and not one had a slow-cooked, meatless tomato sauce. Lots of variations on a theme, but I would venture not one would render this kind of a result.  If you take the time to look at some of the higher end commercial marinara sauces on the market, named after famous chefs or restaurants, what you will find is this very short list of ingredients.  The sauce in the jar will taste just like this sauce after you have cooked it for one hour.  (At a cost of about $2 vs $8.95).  But nothing out there will come close to this. You don’t have to buy the San Marzano Tomatoes, just a good imported Italian brand like Cento or Tutterosa.

4 28 oz cans crushed tomato with added puree
2 cans tomato paste
2 28 oz cans water
3 large sweet onions
10-15 cloves garlic
2 tbs fresh oregano leaves
4 tbs extra virgin olive oil 

  • Chop the oregano and the garlic and put into an 8 quart dutch oven with the olive oil.  Don’t turn it on yet.
  • Chop the onions, and when you are down to the last one, turn on the pan.
  • When the garlic and the Oregano has been sizzling for a minute or two, add the onions and stir.
  • Saute the onions until they start to stick, but don’t brown them or the sauce gets sweet.
  • Add all of the tomato products and water and stir.
  • Bring to a low boil, then a very, very low simmer.  It should bubble in a couple of places, but that’s all
  • If you have screen to go over your pan, use one, it spatters.
  • Stir every hour, scraping the sides down.  But don't scrape the bottom very hard.  Just enough to get most of the bulk off the bottom.  This part can taste burnt, so don't ever really scrape this into the sauce.
  • You can taste every two hours, just to note the differences, but I think the 6 hour version is the best.
  • At the end of 6 hours, turn off the sauce, let it cool and taste.  Adjust your seasoning with salt, black pepper or crushed red pepper if you wish.

I like to put cooked meatballs in the sauce to simmer (but not raw ones, please).  Partially browned and cooked Italian Sausage works, too.  (Meaning it’s still pink inside.)  This sauce will stick to any kind of pasta, but I prefer the large penne, either straight cut, or on the diagonal with the ridges the best.   I would also use this sauce to make lasagna, eggplant or any baked dish.  

It freezes well, and should yield about 4 quarts, enough for two very large family meals.

Thursday
May222014

Black Pepper and Fennel Shortbread Crackers

This is my basic shortbread recipe I use with many sweet combinations, now turned into a savory cracker.  Use the very best Parmigiano-Reggiano you can find, and please, please, grate it yourself.  You will get a much better texture, and a rich, nutty taste no cheese in a green box will render. Oh, and double the recipe.  You won’t be sorry.
Yield:  2 dozen cookies                                                                                      Oven:  325
2 sticks unsalted butter
4 ounces Parmigiano-Reggiano cheese
2-1/2 cups sifted flour
1-1/2 teaspoon whole fennel seed
1-1/2 teaspoon fresh ground black pepper
  • If you have a mortar and pestle, place the fennel in the bowl and crush with the pestle to grind slightly and release the oils of the seeds.  Grind the pepper fresh.  (I use a coffee grinder for all of my spice grinding, so I would put the whole peppercorns in the grinder until slightly more than coarsely ground, then add the fennel and pulse it just a few more times.  You want some texture, but you don’t want to choke.
  • Cut the cheese into ½ inch chunks and place in the bowl of a foodprocessor with the knife blade in place.  Turn on the blade and run until the cheese is extremely fine, and nearly sticking together.  But not quite.  You’ll know.
  • Add the flour to the bowl, and pulse a few times to incorporate.
  • Cut the butter into cubes about ¼ inch square.  (Slice down the stick lengthwise, turn the stick over and slice lengthwise again.  Then slice crosswise into ¼ inch cubes, sliding the cube off the knife and into the bowl of the food processor.  Spread the butter cubes around the bowl.  (Don’t use your fingers, use the knife in your hand.)
  • Pulse the blade about 20 times, until the mixture starts to come into a ball.  
  • Tear two sheets of waxed paper, about 18 inches long and lay out on your countertop.  Dump half of the mixture onto each sheet. 
  • With your hands, gently form a log with the dough, about 1-1/2 round and about 12 inches long.
  • Wrap the waxed paper around the log and work the dough a little more, making it as smooth, round and even as you can.  Fold over the ends, and chill in the refrigerator about 30 minutes.  You can even slip into the freezer and bake later, but wrap in foil so the dough doesn’t dry out.
  • When you are ready to bake, preheat the oven to 325.  
  • Slice the dough into 1/3 inch rounds, place on a cookie sheet at least an inch apart, and bake for about 20 minutes, until they turn golden brown.
  • Allow to cool on the baking sheet on a rack.
  • When completely cool, store in an airtight container.  They will last for several days.
  • (Ok, not in my house, but maybe in yours).
Monday
Mar242014

Slow Cooker Thai Pork and Coconut Rice

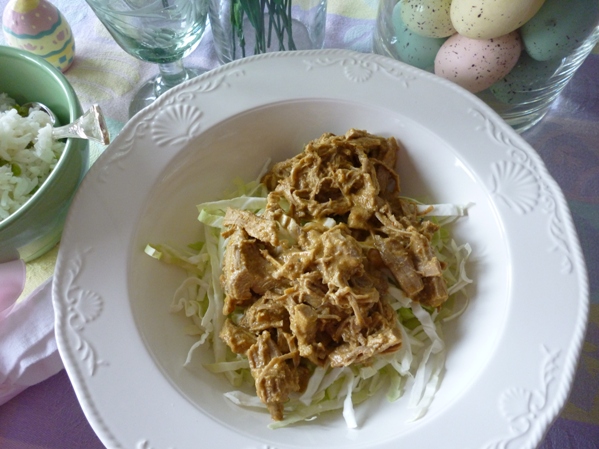
When I get to the end of winter, but its still too cold to pull the grill out, I turn to more exotic spices to make things more interesting.  I had originally tried this method of cooking pork tenderloins for carnitas, and decided I would switch up the seasonings and give this a try.   Really easy.  We served it over tender shredded green cabbage with no other dressing, and Grace The Girl ate the rice and peas.

For the Pork

2 whole pork tenderloins
2 stalks lemongrass, trimmed
2 tsp red Thai chili paste (you can find this in a specialty store, or check the grocery aisle near the Asian foods
2 cans lite coconut milk
1 can regular coconut milk
1 small onion, quartered
2 cloves garlic, peeled
2 tsp salt
1 tsp white pepper
1 cup jasmine or basmati rice
½ cup frozen peas
1 tsp salt

Rub the port with the salt and pepper 

Put the pork, lemongrass, one can of the lite coconut milk, onion and garlic into the slow cooker.  Cover and cook on slow for about 4 hours.

Remove the pork to a board and allow it to rest while you finish the sauce.

Strain the liquid into a large sauce pan, and discard the remaining solids.

Add the chili paste and the can of regular coconut milk to the liquid and simmer for about 30 minutes, until it starts to thicken.

While the sauce is reducing, shred the pork.  When the sauce has reduced down so that it will coat the pork, toss the pork into the saucepan and turn to coat evenly.

For the Rice:

Thaw the peas in a strainer under cold running water.

Pour the other can of lite coconut milk into a 2 cup measure, and add water enough to make 2 cups.  Pour this into a medium sauce pan.

Add the salt, and bring to a boil over high heat.

Add the rice, stir, and lower the heat to simmer, for about 8 minutes, while there is still water on top of the rice.

Add the peas, give it a quick stir, then cover and simmer for another 2-4 minutes.  Turn off the heat and let rest until you are ready to serve, then fluff with a fork and ladle the pork over the rice or serve to the side.

Sunday
Mar232014

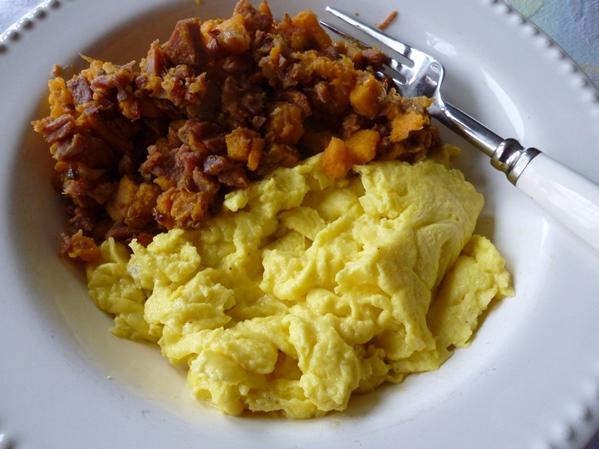
Sweet Potato Corned Beef Hash

This recipe came directly from Lisa Fain's Homesick Texan website.  I just made the change to sweet potatoes because that's what we normally have for potatoes and what was leftover. 


1 large Russet potato, peeled and diced into 1/4" cubes (I substituted sweet potatos)
2 tablespoons vegetable oil or bacon grease, divided
1/2 medium yellow onion, diced
2 cloves garlic, minced
1 or 2 canned chipotle chiles in adobo, finely minced
2 cups (about 3/4 pound) cooked corned beef, finely diced
4 slices Irish bacon, diced
Salt
Pepper
Chopped cilantro, for garnishing
4 large eggs
Warmed flour tortillas, for serving

Place the potatoe in a pot and cover with water. On medium heat, bring the pot to a boil and then boil for 3 minutes. Drain and rinse the potatoes.  I did this the night before so they were cooked, and cold from the refridgerator.

In a large skillet, heat 1 tablespoon of the oil on medium-low heat. Add the onion and cook until translucent, about 5 minutes. Add the garlic and chipotle chile and cook for 30 more seconds. Stir in the potatoes and while stirring occasionally, cook until they are tender and just beginning to crisp, about 5-7 minutes.

Add to the skillet the diced corned beef and diced Irish bacon. While occasionally stirring, cook until the corned beef and bacon are warm, fragrant, and well combined with the potatoes, about 3-5 minutes. Taste and add salt and pepper. Garnish with chopped cilantro and remove from the heat.

Friday
Jan102014

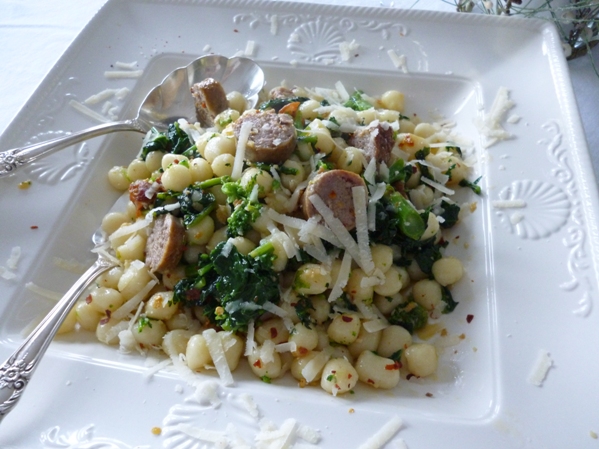
Gnocci with Broccoli Rabe and Sausage

I like this dish because its fast, and I can make the Sausage and Rabe and serve it to my “no carb” husband, then mix the just cooked gnocci into the sauté pan with a little of the pasta water for myself.

2 lbs sweet Italian Sausage
1 large bunch Broccoli Rabe, rinsed, ends trimmed, and chopped into ½ inch pieces
4 cloves garlic, minced
2 Tbs Extra Virgin Olive Oil
1 tsp red pepper flakes (the amount is really up to you.)
1 lbs prepared gnocci (in the cryovac package)

Salt and Pepper to taste

Grated Parmesan Cheese, optional

1 cup water from the pasta water

  • Bring a large pot of salted water to a boil.  Add the chopped Broccoli Rabe and boil for about 10 minutes.  Strain and set aside.  If you  have a pot with a strainer insert, you can use the water again to boil the pasta.  If not, once you have strained out the Rabe, fill the pot again with water and salt and bring it back to the boil for the pasta.
  • In a large sauté pan with a cover, sauté the sausage until just browned on two or three sides.  Remove from the pan and set aside.  It’s not necessary to cook all the way through as the sausage will finish cooking when added back to the pan.
  • Add the olive oil to the pan and immediately add the garlic and the hot pepper flakes.  As the garlic starts to sizzle, add the cooked Broccoli Rabe and toss to insure it becomes coated with the now spicy olive oil, while preventing the garlic from burning.
  • In the meantime, slice the sausage, and add the pasta to the boiling water, for about 6-8 minutes.  Gnocci is done when it starts to float in the water.  Strain, but retain some of the pasta water to finish the dish.
  • When the Broccoli Rabe has begun to steam, add the sausage back into the pan and cover to allow it and the Rabe to finish cooking.  Once the sausage has lost its pink, I turn the pan off and keep it covered.  Allowing the Rabe to cook for any further length of time will render quite an ammonia-like aroma.  Not good.
  • When the pasta is finished cooking, add it to the sauté pan, along with a little of the pasta water and let it simmer for 2-3 minutes to allow the flavors to permeate the gnocci.  Taste for seasoning and adjust the salt and pepper.
  • Serve with a little parmasean cheese.
Sunday
Jan052014

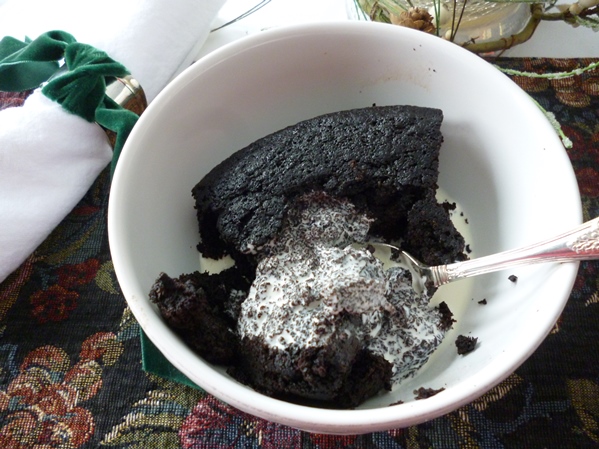
Accidental Molten Chocolate Cake

About 6 servings

I use a large whisk to lighten the flour in my flour canister, then scoop out the flour with a metal measuring cup and level off with the whisk.  This eliminates sifting, then measuring your flour, which is critical, despite what some say.  Flour packs down when left standing, and if you don't aerate it, you will get more flour per measure than intended and a dryer result.  This happy accident yields a crusty exterior, and a rich, pudding like interior.

Dry Ingredients:

1-1/2 cups unbleached, all-purpose flour
½ cup plus 1/3 cup unsweetened cocoa powder
½ Tsp salt
1 Tsp baking powder
1 Tsp baking soda

Wet Ingredients:

10 Tbs unsalted butter
1-2/3 cup sugar
2 jumbo eggs, room temperature
1-1/2 tsp pure vanill extract
1-1/2 cups brewed coffee

  • Prepare a 9-inch round cake pan:  Cut a round of parchment paper to fit the bottom of the pan.  Butter the bottom and sides of the pan, put the parchment on the bottom, butter the parchment, then flour the bottom and sides of the pan.
  • Position a rack in the center of the oven and preheat to 350.
  • In a small bowl, combine the dry ingredients, and whisk together.
  • In a large glass bowl, cut the butter into chunks, and in 15 to 30 second intervals, melt the butter.
  • Whisk the sugar into the melted butter for a couple of minutes. 
  • Add the eggs, one at a time, and whisk in until fully incorporated and light in color.
  • Whisk in the vanilla until blended.
  • Add the dry ingredients and using a spatula, mix quickly until combined.  There may be a few lumps.
  • Add the coffee, and incorporate with a large whisk to smooth out the batter.  Don't overmix.  Just until you cannot see any of the dry ingredients and you are sure there are no lumps.
  • Pour the batter into the prepared pan, tap it on the counter to level it out, and put it into the pre-heated oven. 
  • Bake for about 45 minutes, until the batter domes up and large cracks develop.  Test with a toothpick, and take it out of the oven when the very center is still quite wet.
  • Cool for about 20 minutes in the pan, and then spoon it out into bowls, pour a little heavy cream into the middle and serve warm.
Monday
Dec302013

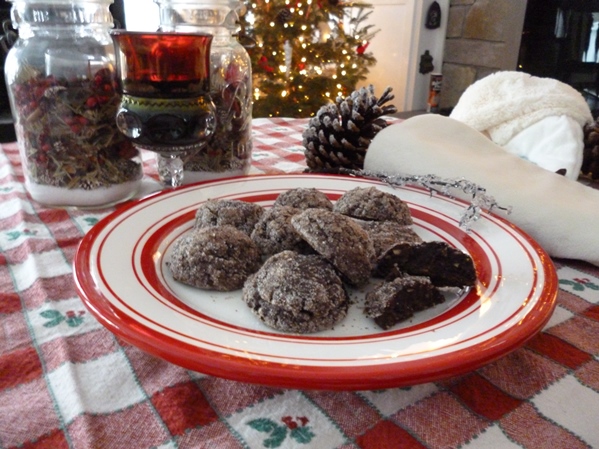
Chocolate Sparkle Cookies

From the LA Times, Best of 2002 Recipes, from the Senses Bakery in Vancouver, Canada.  This recipe does not have a lot of yield (about 3 dozen), so you might want to think about doubling it.


Ingredients:

½ pound 70% Chocolate
3 Tbs. butter, softened
2 eggs
1/3 cup sugar, plus more for rolling
¾ cup raw almonds

  • Blanch the almonds in boiling water for one minute.  Drain, and pour into cold water.  Pinch the almonds so they slip out of their skins.  Let dry completely.  Grind in a food processor into a fine meal.
  • Melt the chocolate in a double boiler over simmering water.  Remove from the heat and cut in the butter.  Mix until melted.  (Alternatively, if you don’t have a double boiler, melt the butter first, then add the chocolate.  This will help prevent the butter from burning.)
  • In a separate bowl, beat the eggs with an electric mixer, adding the sugar until ribbons form, about 5-10 minutes.  Fold in the chocolate mixture, then the ground almonds.
  • Cover and refriderate overnight.
  • Preheat oven to 325.
  • Using a cookie scoop, form the dough into 1 inch rounds, then roll in granulated sugar.  Place on the baking sheet about 2 inches apart, and place immediately into hot oven.
  • Bake about 9-12 minutes, until the center of the cookie is no longer wet.  Don’t over bake as the cookies will continue to cook on the hot baking sheet.  Cool completely on the sheet.
Tuesday
Dec102013

Spiced Pear and Cranberry Chutney

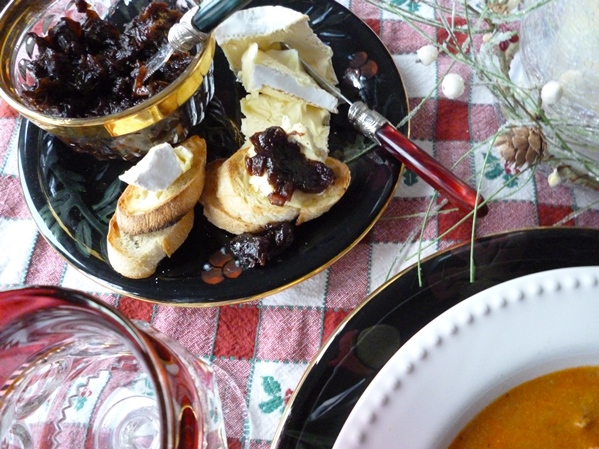
For years I made a Spicy Pear Chutney as I am not a big fan of canned cranberry anything, and never had a good homemade cranberry anything.  Never liked the texture.  But I miss the tang of the cranberry itself, so I decided to adapt my Pear Chutney into a combinedCranberry Chutney.  Yum!  Spicy, Tart, Sweet, Jammy in texture.  Of course, if you wanted to keep it all Pear, or all Cranberry, just double the quantity of whatever fruit you select from the first two ingredients below.


Cranberry Pear Chutney

1 cups dried cranberries/4-5 Dried Pears, diced
1 cups fresh cranberries/2 Bosc Pears, peeled, cored and diced
2 cups sweet onions, diced
4 cloves garlic
2 cups sweet onions, diced
1 cup balsamic and 1 cup cider vinegar/ cups cider vinegar
2 cups brown sugar
2 cloves garlic
2 tsp cayenne pepper
1 tsp ground ginger

Combine all of the ingredients into a large saucepan.   Bring to a boil, then cook until thick and with a consistency like jam.  Allow to cool before storing.  This will keep in the refrigerator for about a week, and perhaps two weeks in the freezer.  Due do the sugar and vinegar levels, it will begin to ferment if kept much longer, so don’t make it too far in advance.

Tuesday
Dec032013

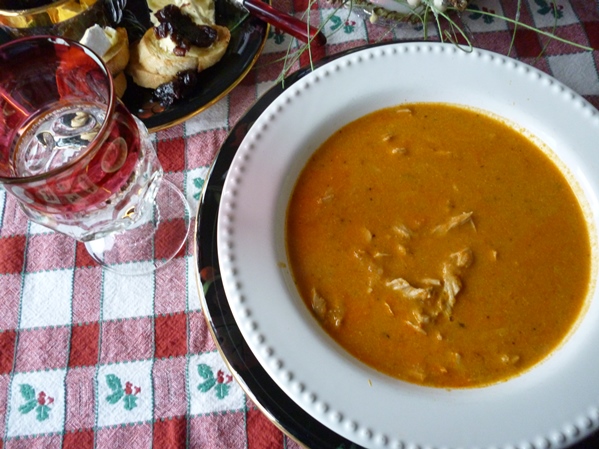
Turkey Paprikash Soup

There are three essential components of this recipe that if you have to substitute, your result will be either different, messier to clean up, or both.  They are:

Homemade Turkey Stock (See Recipe below)

High-quality smoked paprika, both hot and sweet

Inversion/Hand Held Blender (you can use your standing blender or a food –processor, but it’s time consuming and messy.

The Soup:

2 strips hickory smoked bacon, diced
1 stick unsalted butter
2 sweet yellow onions
4-6 stalks celery
2-4 large carrots
4-6 cloves garlic
2 tps sweet smoked paprika
2 tps hot smoked paprika
6-8 cups homemade turkey stock (See Recipe Below)
1-2 tsp hickory smoke flavor (if you can’t find smoked turkey parts)
1 cup sour cream
½ 10 lb Turkey Breast, trimmed and shredded (more if you like a meatier soup). 

  • Finely chop all of vegetables and garlic.  In a 6-8 quart dutch oven, sauté the bacon until it is fully rendered, the remove from the pan and set asidse.
  • Add the butter to the pan and when it begins to foam, add the garlic, the onions and the celery.  Saute until they just starting to brown. 
  • Add the carrots and sauté 2 minutes.
  • Add about 1 tps salt and ½ pepper, stir and allow to sauté another 1 minute.
  •  Add the paprika over the vegetables and sauté 1 minute, being careful not to burn the paprika, then immediately add about 2 cups of the stock.
  • Bring to a boil until the carrots are cooked through.  Test a piece of carrot to make sure it is soft enough to puree.
  • Turn off the heat and run the inversion blender in the pan until all of the vegetables are pureed.  You should have a thick base.  Add 2-4 more cups of stock and stir.  Your base should still be a very thick consistency.   If you are not sure, only add 2 cups of stock at this stage. 
  • At this stage, I sometimes remove some of the base, if I don‘t think I have enough turkey for it, freeze it.  If I have some leftover turkey, I just thaw it, then add the sour cream and shredded turkey, and I have soup.
  • Add the sour cream, and bring to a low boil, until the base reduces slightly.  Add the turkey, then adjust the amount of liquid, either stock or sour cream, to get the hearty soup mix you want.   
  • Serve with a small dollop of sour cream and some crumbled bacon on top.  A bit of greenery won’t hurt either.

Turkey Stock

I make turkey stock a week or so in advance of Thanksgiving, and freeze it in separate containers for the Thanksgiving gravy and dressing, and then the soup gets made after Thanksgiving.  Well worth the effort, both for your dinner, and for leftovers, like this soup.  If you can’t find already smoked turkey parts, just buy raw turkey legs and wings, and roast them in the oven until they are very brown.  You are not going to eat the meat, so don’t worry about them being overdone.

2-4 pieces smoked Turkey parts (wings, drumstick, neck or back)
1 onion
2 carrots
2 stalks celery
2 cloves garlic
2-3 Bay Leaves

Put all of the ingredients in a 8-10 quart stock pot, fill with spring or filtered water (if your tap water is not what you would normally drink), to cover.  Bring to a boil, then simmer for about 2 hours.  Strain out all of the solids and discard them.  Chill the stock overnight, skim off the fat, and freeze.  You will need approximately 2 cups for the dressing, 1-2 cups for the gravy, and the remaining stock is for the soup, approximately 5-8 cups.