Recipe Links
Basil Oglio Fra Diavlo Black Pepper and Fennel Shortbread Crackers Bleu Bacon and Italian Burgers Blueberry Almond Crumble Pie Braised Beef Short Ribs Breakfast Sausage Butter Pecan Shortbread Cookies Buttermilk Pancakes California Grilled Artichokes Capressa Fra Diavlo Cherry Garcia Icecream Cherry Sangria Chicken and Polenta Chicken Cacciatore Chicken Vegetable Soup with Broccoli Rabe Chocolate Cake with Chocolate Ganache Frosting Chocolate Sparkle Cookies Christmas Shortbreads Classic Hummus Coconut Cake Coq Au Vin Wine Braised Chicken Cranberry Orange Crumb Cake Cream Corn and Lima Bean Succotash Devishly Chewy Brownies Eggplant Parmesan Fetticini Alfredo with Bacon and Peas Fusilli a la Vodka Sauce Ginger Chocolate Spice Cookies Gnocci with Broccoli Rabe and Sausange Gramma Daly's Cole Slaw Grilled Beef Tenderloin with Blue Cheese Butter Grilled Swordfish Hazelnut Biscotti Cookies Heavenly Blondies Homemade Italian Sausage Homemade Sauerkraut Hot Artichoke Dip Italian Meatballs Lasagna Bolonase with Ragu Sauce Little Sister's BBQ Ribs Molten Chocolate Cake Olio fra diavlo pasta salad Pumpkin Gingerbread Cake Quiche (Sans the Lorraine) Red Velvet Cake Seafood Francaise Shaved Brussel Spouts & Polenta Cake Slow Cooker Thai Pork and Coconut Rice South Florida Fish Stew Spagetti ala Olio Aglio and Pepperoncino Spiced Pear and Cranberry Chutney Steak Braciole Sunday Tomato Sauce Sweet Potato Corned Beef Hash Swordfish Oreganade Teriyaki Pork Tenderloin and Spicy Thai Peanut Sauce The White House Maryland Crab Cakes Tomato Bisque with Chichen and Rice Turkey Paprikash Soup Walnut Shortbread Christmas Cookies White Bean Pasta Fagioli

Better ingredients, better technique, better results.

Entries by Margot (71)

Sunday
Dec302012

White Bean Pasta Fagioli


One pan, one colander, one spoon, unless you count the one you eat with.  This pasta dish takes about 15 minutes to make from start to finish, and it’s a snap to clean up.   

Ingredients

1/2 pound dried pasta shapes
1 15 ounce can small white beans
2 Tbs unsalted butter
¼ cup pasta cooking liquid
2 Tbs fresh chopped sage
2 gloves chopped garlic
¼ cup finely chopped sweet onion or shallot
½ ounce grated fresh parmesan cheese.
Salt and Pepper

  • Bring 4 quarts of water and 1 Tbs salt to a boil.  Add the pasta, and boil according to package directions for “al dente”
  • While the pasta is cooking, rinse the white beans into a colander.
  • When the pasta is finished cooking, ladle approximately ¼ cup of the cooking liquid into a container and reserve.  Drain the pasta in the colander with the beans.  Do not rinse.
  • Return the pan to the heat, and melt the butter. 
  • Add the chopped onion or shallot, the garlic and the sage to the butter, and sauté until the butter starts to brown.
  • Add the cooking liquid to the pan, then immediately add the pasta and the beans.  Toss in the pan for a minute or two, to allow the pasta to absorb the sauce and finish cooking.
  • Adjust the seasoning with salt and pepper, and serve immediately with the fresh grated parmesan cheese.
Sunday
Dec022012

Steak Braciole (Stuffed Beef Steak)

My mother made this for us when we were kids, but it was never my favorite.  She made it with brown gravy, and more than likely she used Gravy Master, which has an aftertaste I have come to avoid.  Not long ago, Chris and I dined on Wooster Street, and he ordered Braciole.  When the dish came to the table, it was with a tomato sauce and served with gnocchi.  The minute I stole a taste, I started crafting my own recipe, and this is the result.

I would recommend that you ask your butcher to slice the meat fresh for you, rather than buying it already cut in the meat case, and ask that the top round steak be cut lengthwise, so you get about  four very large slices of steak from a single top round steak about an 1 ½ thick.  Why?  Because you can get four large rolls out of it, which is a lot less work than eight small roles.  You can add bread to the stuffing if you wish (about a cup should do it, and perhaps a little bit less of everything else).  Since Chris is a “no-carb” guy, I don’t.

For the Stuffing:

¼ lb Fontina or Sharp Provalone Cheese, diced small
¼ cup black or Italian green olives, pitted
¼ lb prosciutto or salami, or any other cured meat you wish, diced small
¼ cup toasted pine nuts
8-10 slices sun dried tomato, cut into 3rds
2 large handfuls baby arugula (you can substitute nearly any other green, such as parsley or even broccoli rob)
1 egg
½ teaspoon red pepper flakes, optional

  • Put all of the ingredients into a food processor and pulse until the mixture is just shy of a paste.  Set aside.

For the Steak:

1 large top round steak, 1 ½ inches thick, sliced into four pieces
12 six-inch long pieces of cooking twine

For the Sauce:

2 medium sweet onions, diced
3-4 cloves garlic, minced
2 Tbs olive oil
1 Tbs dried oregano (or any or all other dried Italian herbs, such as majorum  or basil)
½ cup red wine
1 cup water
1 tsp salt
½ tsp pepper
½ tsp red pepper flakes, optional
1 28 ounce can crushed red tomatoes (I prefer Centos)
1 Tbs tomato paste

  • Pound the steaks in a plastic bag with a meat hammer or rolling pin, just to even out the thickness and for a little tenderizing.
  • Place about 1 cup of the stuffing on each piece of steak, spread out into about a one inch roll, down the length of the meat.
  • Fold the two ends of the steak in, then fold once side over and roll over the other side, with the edges facing down.
  • Tie the steaks with three pieces of string each.  You can refrigerate the meat at this point, and continue the recipe later in the day or even the next day.
  • In a large skillet, heat 1 tbs of the olive oil until just smoking.  Place the steak rolls edge side down in the hot oil and don’t move them until they release easily from the pan.  Sear again on the top side, carefully turning the rolls so as not to squeeze out the stuffing.  You can sear on all four sides, however, I find that by the last side, the stuffing is beginning to ooze out, so I remove them to a baking dish.  They will cook plenty again in the oven.
  • In the same pan, heat the remaining 1 tbs of olive oil.  Add the garlic and the onions and cook until the onions between to caramelize.
  • Add the herbs and the salt and pepper, give it a stir, and then add the wine and the tomato paste.  Once the paste is dissolved, add the crushed tomatoes and the water, and simmer for about 30 minutes.
  • Pour the sauce over the steak rolls, cover loosely with foil and place them into a 300 degree oven for about an hour.  Remove the foil, turn the oven up to 350 and continue baking, until the steaks are browned on the top and the sauce has thickened.
  • Serve with Angel Hair or your favorite vacuum-packed gnocchi.
Friday
Nov162012

Hazelnut Biscotti Cookies

The secret to these biscotti is eliminating the “twice baked” process.  It’s cumbersome, you can’t cut them properly when they are still hot and it dries them out into that stale, brick like consistency many people dislike. The intensely artificial extracts added to most commercial products don’t help either.
This recipe is actually quite a bit less work than twice baking, and yields a slightly crunchy exterior and a chewy interior.  Not too sweet either, which makes them excellent accompaniments to a glass of wine. You can use almonds instead of the hazelnuts, which would eliminate having to remove the skins, and substitute orange zest for the lemon, but this version is my favorite.

Makes 2 loaves

Ingredients

2 heaping cups raw hazelnuts
2 sticks unsalted butter, softened
2 cups sugar
4 extra large eggs
4 cups flour, plus another 1/4 cup for shaping
Zest of 2 lemons
2 teaspoons pure vanilla extract
2 teaspoons baking powder
1/2 teaspoon salt
  • Place the nuts in a jelly roll pan and bake in a 350 degree oven for 15-16 minutes, until the skins turn dark.  Let cool about 15 minutes.  
  • Take the Jelly Roll Pan with the nuts in it, a clean dishtowel, and an empty bowl and go outside.  I don’t care how cold it is, you will thank me for it when you have finished this step.  
  • Place a handful or two of nuts into the middle of a dishtowel and bring the ends and sides of the towel up until you can close your hand around it.  With the other hand, rub the nuts through the towel against themselves to remove as much of the skins as possible.  
  • Carefully, open up the towel and scoop the nuts into the bowl.  Then holding the towel away from you and away from the wind, shake the towel out.  Keep doing this until your entire back yard is covered in skins.  Bring the nuts inside. 
  • Nuts can be prepared ahead to this point, and frozen, however, I like the more intense flavor you get when you chop them in the food processor while they are still warm, then scrape directly into the batter.
  • Preheat your oven to 300 degrees.
  • Cream butter with a mixer until light and fluffy.  
  • Add sugar and beat until fully incorporated. 
  • Add eggs and vanilla, and beat again.  Add lemon zest and beat once more.
  • Chop the hazelnuts coarsely in a food processor, and add to the mixture.
  • In a separate bowl, sift together flour, baking powder, and salt.
  • Add the dry mixture to batter, and pulse the mixer until just incorporated, about 20 times. Don’t over mix or your cookies will start to get tough.
  • Scrape the dough onto a cookie sheet in roughly the form of a log.
Sprinkle a little more flour on top of the log.  Flour hands, and shape the dough into a loaf about 10" long, 2-3" wide, and 1-1/2" high.


 YOU ARE HERE! 


  • Bake in a 300 degree oven, for about 50-55 minutes, or until log is golden brown. (I've also tried them at 325 for 40-45 minutes, and the result in nearly the same.  Just a little moister on the inside and not as crunchy on the outside.)
  • Remove from oven and let cool completely, ideally about 2 hours, but 15 minutes should work.  Just don't cut them when they are hot or you won't get a clean edge.  
  • I serve these on a board, and let guests slice them into ½ inch diagonals as they enjoy them. They can be wrapped in waxed paper and foil if you are going to serve them within a couple of days.  
  • If you want to store them longer, scrape the dough onto a sheet of waxed paper, form the log, then wrap tightly in the paper and foil, and place in the freezer.  They can go from freezer to oven the day you are going to bake them.
Friday
Oct262012

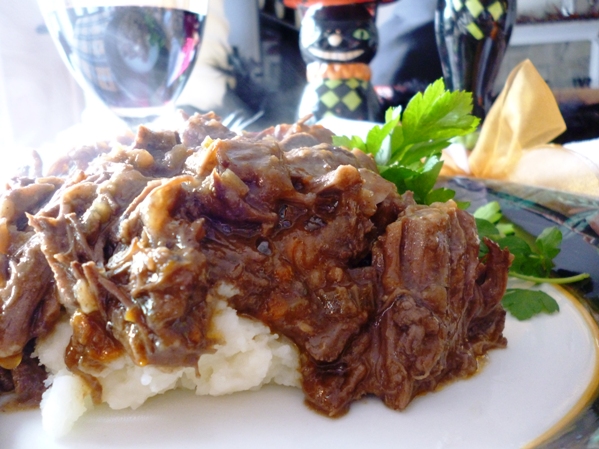
Braised Beef (Short Ribs)

This braised beef recipe is typically done with beef short ribs.  After realizing how much fat and bones I was discarding, I starting using a flat cut beef brisket.  I make it a day or two ahead, trimming off the fat cap before cooking, store it in the refrigerator, then skim off more fat before you reheat it. 

This is a huge recipe.  You can cut it in half, but for the amount of work this is, and the mess it makes, I'd just as soon have another dinner party or Sunday out of it later on, since it also freezes very well.

6 lbs flat cut brisket, cut into 3 inch cubes
1 cup flour
1 tsp salt, 1 tsp pepper
2 Tbs olive oil
2 strips bacon, cut into ½ slices
4 large cloves garlic, minced or finely chopped
3 medium sweet onions, chopped
3 carrots, sliced
3 celery stalks, chopped
1 tsp salt, 1 tsp ground pepper
1 Tbs savory leaves
1 tsp sweet smoked paprika
2-3 stalks of rosemary
1 small bunch fresh thyme
2-3 bay leaves
Pinch fresh ground nutmeg
6 cups brown stock
6 cups full-bodied red wine
½ can tomato paste
2 Tbs unsalted butter and 2 Tbs flour, mixed with your fingers or a fork into a paste or roué.

  • Sprinkle the flour with the first round of salt and pepper and mix thoroughly.  Dredge the meat in the seasoned flour, shake off the excess, and brown on at least two sides in the olive oil.  If you did not remove the fat cap, brown on the fatty side until very crisp.  Remove the pieces and set aside.
  • Once all of the meat is browned, and removed from the pan, add the bacon and render completely.  Add the onions and sauté until they start to color. 
  • Add the celery and sauté until is starts to turn translucent.  Add the carrots, and sauté another 5 minutes.
  • Sprinkle the vegetables with the second round of salt and pepper, then add all of the dried spices and allow them to sauté into the vegetables for a minute or two. 
  • Add all of the liquids (stock, wine, tomato  paste) to the pan.  
  • Tie the rosemary, thyme and bay leaves into a bundle with cotton twine, or wrap in cheese clothe tied with cotton twine.  Add the herbs to the pan.
  • Add the meat back into the pan and simmer for 2-1/2 to three hours, until the meat it fork tender and pulls apart easily.
  • Remove the meat from the sauce.  When the meat is cook enough to handle, I trim off the excess fat, bones if using short ribs, and partially shred the meat, and refrigerate it separately from the sauce.  Then store the sauce separately overnight in the refrigerator.  
  • Skim the fat off of the sauce, return it to a Dutch oven, and let it boil/reduce by nearly half.  Then adjust the seasonings (it will likely need a good amount of salt and pepper, but don’t re-season until the sauce is reduced or you will get a very salty effect), and add the roué to thicken.  Once the sauce is thickened, add the meat back in, and simmer until it is heated through.
  • Serve with a thick hearty bread and butter, buttered noodles, or mashed potatoes.  Sprinkle with some fresh parsley.
Friday
Oct262012

Spagetti ala Olio Aglio and Pepperoncino

You would think that a nice Italian girl from Connecticut would have known how to make this dish.  But Nooooooooooooooooo.  That tall, blonde, Swedish drink of water taught me this recipe.  Actually, she cheated.  She lived on the border of Switerzland and Italy for a time, and learned how to make it there. 

I was watching "Lidia's Italy" the other night, and she made this recipe, and Ina Garten called it "midnight pasta" because its what you make when you get hungry after midnight.  Guess it's just one of those classics.

Lidia did grind the pepper flakes into a powder, and I decided to try it that way because it I thought it would photograph better.  (Nope, should have left the red pepper flakes as they were.) It's a pantry staple, oh so simple, and this is the first time I have even attempted to write it down.  Use your best guess on the amounts.

Ingredients:

Extra Virgin Olive Oil
Garlic, sliced, crushed or minced, whatever you like
Dried Red Peppers, flakes, whole, ground in a spice grinder, whatever
Pasta (your choice, but we always did angel hair)

  • Boil the pasta according to package instructions.  While the pasta is cooking, you can put the sauce together.
  • In a saute pan, heat the olive oil until it begins to shimmer.  Add the garlic and the red pepper, and immediately lower the heat, or remove the pan from the heat.  Stir.  You don't want either the garlic or the red pepper to burn.  If you sliced your garlic, you might want to let it saute just a bit more until it becomes golden, then toss in the red pepper.
  • Pour the sauce over the pasta, toss and serve with parmesan cheese.
Sunday
Oct212012

Heavenly Blondies (Cookie Bars)

These are actually toll-house cookies, spread in a sheet pan.  My mom taught me this years ago, and it is still my favorite.  The blondies bars are always just the perfect combination of a crusty top and chewy centers.  I have witnessed several cooking competitions for making Blondies, but I still say, "stick with what works" which is a classic toll house cookie batter.  I prefer them with nuts, but they are just as good without.  

3 sticks unsalted butter, softened
1 ½ cups light brown sugar, packed
1 ½ cups granulated sugar
3 tsp pure vanilla extract
3 extra large eggs
4 ½ cups unbleached, all purpose flour
1 ½ tps baking soda
1 ½ tps salt
10-12 ounces caramel candies, chopped (you can substitute chocolate chips)
2 ½ cups pecans, coarsely chopped. (any nut will work)

  • Butter and flour for a 13x18” sheet pan.  
  • Preheat oven to 325.
  • In the bowl of a stand mixer, using the paddle, cream the butter until it’s fluffy.  
  • Add all the sugar, and cream for another 2-3 minutes.  
  • Add the eggs, one at a time, creaming until each is incorporated.  
  • Add the vanilla and incorporate.  
  • Add the candy, chips and/or nuts and mix until they are spread evenly throughout the batter. (This allows you to mix them in before adding the dry ingredients, which will ensure a tender texture.)
  • While the mixer is working, mix all of the dry ingredients together in another bowl.  Then add the dry ingredients to the wet batter. 
  • Keeping one hand on the top of the mixer, turn the paddle on for just one-half a revolution, stopping and starting the mixer just a half turn, until the flour is fully incorporated.  If you turn it on even at the first speed and let it run, you’ll have flour all over yourself, and likely the kitchen floor.  Don’t overmix.
  • Empty the cookie dough onto the sheet pan.   Using a butter knife, spread the mixture evenly in the entire sheet pan, all the way to the edges, and the same thickness all over. 
  • Bake for 30-35 minutes, until the dough puffs up, deflates, and is golden brown all over.
  • Allow to cool in the pan until just warm.  Then invert onto a board until completely cool, and cut into squares. 
Tuesday
Oct162012

Thanksgiving Deconstructed

There isn't a culinary magazine on the stands that isn't filled with sure fire recipes to take your Thanksgiving meal back to basics, up a notch, classic with a twist, or onto the list of good things.  Many of us actually dread cooking Thanksgiving.  Let's face it, it's one of the hardest, most expensive, time-consuming, and oven consuming meals out there.

Why?

Because everyone has their version of, "It's not Thanksgiving unless we have (insert from the list below)."

Turkey
Gravy
Gravy with giblets
Turkey Stuffing
Mashed Potatoes
Sweet Potato Casserole
Broccoli Au Gratin
Garlic Green Beans
Braised Brussel Sprouts
Creamed Onions
Cranberry Compote
Pear Chutney
Apple Pie
Pumpkin Pie
Pecan Pie

By the time you are done with the list of must haves, you are now cooking ten different dishes, juggling timing and oven space, and lists of ingredients a mile long.  You spend a fortune, a full week cooking, and in fifteen minutes everyone is finished eating.  There were so many choices your guests put one tablespoon of every dish on their plates and you have food enough left over to feed an army.

At least that was what happened the first time I cooked a Thanksgiving Dinner.

These days, I have a different approach, and I thought I would try to launch my How To Journal with some of my methods and short-cuts for Thanksgiving:

  1. Pick five dishes from your list and don't budge from that list.  If anyone of your guests insists on a dish, let them bring their own.  Yours will never match anyway.  So, something like Turkey, Turkey Gravy, Turkey Dressing, Potato, and Vegetable isn't so daunting.   If any of your guests offer to bring something, let them bring an appetizer, dessert or a garnish.  Tell them to bring the dish already cooked, in the dish they are going to serve it in, with serving utensils.  (I've gone so far as to tell them to bring their dish home dirty, to cut down on clean-up.)  If they want oven or cook top time, they are just going to get in your way.  And if you have guests that are chronically late, have them bring dessert, not appetizer.
  2. Don't stuff the turkey.  Make Turkey Dressing, cook it in a casserole dish.  Remember our mothers getting up at 4am to get the stuffing made, let it cool, get it into the bird, and get the bird in the oven for nearly six hours, and then race to get the stuffing out of the bird before the USDA police caught them?  Waste of time if you know one secret.  (Ok, maybe two).  Keep reading.
  3. Make Your Own Turkey Stock.  What comes out of can or a box, tastes like the can or the box.  I usually roast a turkey breast sometime in the fall, and save the carcass, but if not, buy a turkey breast in the deli/rotisserie section of the grocery store.  Enjoy the meat, and keep the bones.  Ask the butcher if he has any turkey wings or neck bones for sale, take them home and just roast them in the oven.  Then use any or all of this to make your stock.  Throw all the cooked bones into a stock pot, add a carrot, onion, stalk of celery, garlic clove, and bay leaf and boil it for about two hours.  Drain the solids out and discard them.  If you have made the turkey stock in advance, let it cool down, then skim the fat off the top. When you are ready to make your Turkey Dressing, using this stock for the liquid will make it taste like it came right out of the bird.  And use it for your turkey gravy as well.  It will taste like you took all day to make your gravy.
  4. Make your own bread stuffing.  What comes out of a box or a bag, tastes like the box or the bag.  I've made my own cornbread the week before, broke it up into chunks, and let it get stale on a jelly roll pan in the oven until I'm ready to use it.  Alternatively, buy a loaf of your favorite bread from the bakery and have them slice it.  When you get it home, you can cube it, or break it apart, let it get stale, and then throw it in the freezer until you are ready to use it.  Using your own bread stuffing will make all the difference in whatever recipe you use.  And if you butter the bottom of the dish you will get that nice crunch that comes from the outside crust of the stuffing that usually falls out of the bird.
  5. Roast your unstuffed turkey on a rack in a low sided roasting pan, in the oven at 325, use a meat thermometer that has a probe wired to a gauge outside of the oven, and don't open the oven until the turkey is done.  Don't baste it.  You don't need to.  Every time you open that oven, you lose at least 150 degrees, and now the oven has to get back up to temperature which only prolongs your cooking time.  Whatever recipe you are using will yield a tender, moist turkey with this method because it cooks more evenly, and in a shorter period of time than a traditionally stuffed turkey and basting.  I cook mine to 183 degrees.  I know that sounds like too much according to all of the gauges, but we like our turkey done.  I have never had a dry, tough, or worse, bloody turkey using this method.  As soon as your turkey is done, you can put the stuffing in the oven, and turn the oven up to about 375 for 45 minutes.  By the time you let your bird rest, make the gravy, and carve the bird, your dressing will be done.
Friday
Oct122012

Chicken and Polenta (two versions)

This recipe is not for the faint of heart.  Not kidding.  It’s a heart attack on a plate, so it doesn’t get made but once or twice a year.  This was the only “northern” Italian recipe my mother knew of, when we were kids.  Most of both sides of the family were from Naples, and some from Sicily, so the classic red sauce was our fare. 

My great aunt married a Gozzi, from Guilford, and his family was from Northern Italy and they passed this recipe along. 

My mother seasoned the chicken with salt and pepper, and then fried it in butter and sage, very slowly, in a cast iron frying pan.  Then she added heavy cream to the pan, and let it simmer.  That’s it for Version 1.

Version 2 is my adaptation because frying chicken is just too messy.  The result is exactly the same.  I also like to do this dish a day ahead of time, so that I can put the pan drippings into the refrigerator to chill, then scrape off the excess chicken fat.  Proceed from there the day you are serving.  

Some of you have asked for adaptations to recipes instead of cream.  You can try to make the sauce as a regular gravy, by adding some water to the pan drippings and letting them loosen and dissolve, then thicken with a flour and water slurry.  It will taste different, but how bad could it be?

Ingredients

3 lbs chicken, cut up, your choice
White pepper
Salt
Large bunch of fresh sage, leaves chopped
2-4 tbs unsalted butter
1 cup heavy cream

The Day Before:

  • Preheat the oven to 425 degrees.
  • Dry the chicken pieces and sprinkle them with salt and white pepper. 
  • Pat about half of the sage into the chicken pieces.  Place the chicken, skin side up, on a large baking sheet.  Depending on the size of the pieces, I may only have 4 pieces on each sheet.  You want to leave plenty of space between the pieces so that they really sear, the skin gets crispy and the pan drippings get nice and brown.  Use two sheet pans if you are making a lot of chicken.  Just arrange your oven racks to the upper and lower thirds of the oven.
  • Roast the chicken for about 45-60 minutes, or until a thermometer reads 185 degrees.  I know, most thermometer guides tell you 160 for poultry, but we like the meat to fall off the bone.  When you cook it in this hot an oven with the skin on, it still remains amazingly juicy and tender.
  • Allow the chicken to rest for about 15 minutes, then remove it from the pans to a cutting board.  When the chicken is cool enough to handle, remove the meat from the bones and store in the refrigerator.
  • Scrape all of the pan drippings and liquid into a small bowl and refrigerate. 

The Next Day:

  • Scrape the excess fat from the drippings in the bowl and discard the fat.  In a large sauce pan, melt 2 tbs of butter until it sizzles.  Fry the remaining chopped sage in the butter until it becomes crispy and fragrent. 
  • Pour the pan drippings into the butter and sage and allow it to come to a boil for a few minutes to allow all of the scraped up bit to dissolve.  Pour the cream into the sauce pan and simmer until it begins to thicken.
  • Place the chicken in a casserole dish and pour the cream sauce over it.  Reheat in a 350 degree oven for about 30 minutes, until the chicken is heated through and the sauce bubbles. Pour the cream gravy over the chicken and the polenta and serve.

Polenta

Depending on what brand you buy, various types of polenta call for different ratios of corn meal to water.  I recommend using the ratio on the package you purchased, and I like to substitute half the water with whole milk.  

My mother taught me this fool-proof method for cooking polenta.  Much easier.  I vividly remember her standing over a pot of boiling water, laboriously sprinkling in the corn meal with one hand and stirring the water with the other. 

Polenta will hold in the pan for quite some time, so you can get it made and let it sit on the cooktop for a good hour, depending on your cookware.

  • In a very large sauce pan combine the polenta, the water and the salt. 
  • Turn on the heat and as the pan heats up, stir the polenta.  
  • As it starts to thicken, you don’t have to stir continuously, but until it does, keep stirring.  
  • When it stars to boil, watch out.  If it spatters on you, it hurts.  That’s why I use a pan much larger than necessary for a little spatter protection.
  • You can serve the polenta soft like mashed potatoes.  
  • Or, you can pour the polenta into a bread pan and chill overnight in the refrigerator.  
  • Coat the pan with a little olive oil before you pour the polenta in.  
  • The next day, invert the pan onto cutting board and let the polenta fall out in a single loaf.  
  • Slice the polenta into 1 inch thick slices.  
  • Place them on a baking sheet, brush with a little olive oil and brown them slightly under a broiler.  Turn them after about 10 minutes to get both sides a little crispy on the outside, creamy on the inside.

Serve with the chicken and cream gravy. 

Saturday
Oct062012

Devishly Chewy Brownies

For nearly a year, my cousin Leslie and I were in a brownie bake-off to try and find the best brownie recipe.  We agreed that brownies had to have four great characteristics: 


1.  They had to be chewy.  Not fudgy, not cakey.  Chewy.
2.  They had to have great taste.  Very chocolatey, but not too sweet.
3.  They had to have a shiny, crackley crust on the top.
4.  They had to have walnuts.

We experimented with several brownie recipes, and while we got great flavor and nuts, we couldn’t replicate the crusty, chewy texture of the boxed brownie mixes.  Eventually we gave up.  I moved on to my next perfect recipe, and she went back to the Ghiradelli Brownie box mix.

Until now.  I found it.  And, I found out the secret.

Turns out, it is the ratio of fats that gives brownies their texture, and America’s Test Kitchen solved the equation.  You can access the recipe and article on their web site (The Secret to Chewy Brownies), but here I give you my version, adapted by replacing the boiling water with brewed coffee, thereby eliminating the espresso powder, and the addition of walnuts.

Further, I use two, very high quality, non-stick baking pans which are 9 inches square.  I butter and flower the bottom and sides of the pans.  That also eliminates the necessity of the foil sling.  These brownies will turn right out of the pan onto a cutting board in one single piece.

I’ve also perfected the “one bowl” mixing method, making these brownies a snap to make as well.

Makes 32 2-inch brownies

Ingredients

1/3 cup Dutch-processed cocoa
½ cup plus 2 Tbs brewed coffee, heated to just boiling
2 ounces unsweetened chocolate, finely chopped
4 Tbs (1/2 stick) unsalted butter, cut into ½ inch slices
½ cup plus 2 tablespoons vegetable oil
2 large eggs
2 large egg yolks
2 tps vanilla extract
2 ½ cups sugar
1 ¾ cups unbleached, all-purpose flour
¾ tsp table salt
1 ½ cups roughly chopped walnuts

  • Preheat your oven to 350 degrees.  Convection if you have it.  Butter and flour the bottom and sides of one 9” inch non-stick baking pan.
  • Place the chopped chocolate and the butter in a metal bowl.  Sift in the cocoa powder.  Add the hot coffee and stir until completely melted.
  • Add the vanilla, oil, and whisk until smooth.
  • Add the eggs and egg yolks and whisk until smooth.
  • Add the sugar and whisk until smooth.
  • Sift the flour into the batter, and whisk again until just smooth.
  • Adds the nuts, and stir with a spatula to spread through the batter.
  • Divide the batter between the two pans, and bake on the middle rack of the oven for about 25 minutes, until a toothpick comes out just barely clean.
  • Allow to cool in the pans completely.  Turn the brownies out onto a cutting board, and leave until they are completely cool.  Then cut into squares.
  • They freeze well if wrapped in waxed paper and foil.  Unfortunately, they taste just as good frozen, so if you think hiding them in the freezer will keep them from being gobbled up all at once, you are kidding yourself.
Saturday
Sep292012

Chocolate Cake with Chocolate Ganache Frosting

This chocolate cake and ganache frosting recipe came out of a Food and Wine magazine from the 90’s, but I have made one important change:  I use brewed coffee instead of water, which makes a very intense, dark chocolate cake, very moist, and just sweet enough. 

The frosting is creamy and rich, not too sweet, and not a hint of sugary grit.  It’s a snap to make, despite all of my verbose instructions.  Vanilla or coffee ice cream would be great with it.

For two 8 cake inch pans 

Preheat over to 350, Convection if you have it. 

For the Cake

2 cups flour
2 tps baking powder
2 tps baking soda
1 tps salt
2 cups sugar
4 oz unsweetened chocolate
6 tbs unsalted butter
1 tps vanilla
2 eggs, slightly beaten

For the Frosting

1-1/3 cup heavy cream
1-1/2 cups sugar
6 oz unsweetened chocolate
1 stick, 2 tbs unsalted butter
1-1/2 tps vanilla
pinch of salt

Bake the Cake:

  • Butter and flour cake pans, line bottoms with parchment paper then butter and flour the paper. 
  • Sift together the dry ingredients (flour, baking powder, baking soda, and salt)
  • In a saucepan, combine the sugar with 2 cups brewed coffee, and bring to a boil until sugar dissolves.  
  • While the sugar and coffee are heating up, roughly chop the chocolate and place into a large bowl.  Cut the butter into chunks and add it to the bowl. 
  • Pour the coffee and sugar mixture over the butter and chocolate.  Stir until all of the chocolate is melted.  This may take a few minutes.
  • Add the vanilla. 
  • Using a hand mixer or large wisk, beat the eggs into the chocolate mixture, then add the dry ingredients, beating until just smooth.  Don’t overbeat once you add the flour, or you will get a tough cake. 
  • Pour the batter into the prepared pans, never filling more than 2/3 full.  If you have leftover batter, put it into cupcake tins and bake after the cakes are done.
  • Place the cakes into the pre-heated oven, on the center racks.  The cakes are done when a toothpick comes out almost clean. 
  • Cool the cakes in the pans for about 10-15 minutes, then invert onto a rack to finish cooling.  
  • If you are making the cake in advance, let them cool completely, then wrap in plastic wrap and then foil and freeze until you are ready to assemble.  You can frost them frozen if you wish, just leave the cake at room temperature for several hours before serving.  

Make the Frosting: 

  • You will need two bowls for this method.  One of the bowls needs to sit inside another bowl that is half-filled with ice and some water.  You want to be careful not to let any of the ice water splash into the frosting mixture while you are beating it, as that will cause the frosting to seize up.  Try out a couple of different size bowls before you start. 
  • In a saucepan, bring the cream and sugar to a boil, reduce to simmer, stir until reduces, about 6 minutes.  
  • While the cream and sugar cook, roughly chop the chocolate, and the butter and place into the smaller bowl. 
  • Add the cream and sugar mixture to it, then the vanilla and salt.  Stir until the butter and chocolate are completely. 
  • Set the bowl over the larger bowl of ice with a little water.  With an electric mixer, beat until the frosting becomes thick and glossy. 

Assemble the Cake:

  • If your cakes have a domed center, you may want to slide a serrated knife across the tops of the cake layers to level them out.  When you place the layers, always put the bottom of the layer upwards to frost.  This will help eliminate crumbs getting into the frosting as you assemble the cake, and give you a much neater appearance.
  • Tear four pieces of waxed paper, about 4 inches wide, and lay them out on the edges of your cake plate. 
  • Place the first layer upside down on the plate, with the bottom side up, so that the waxed paper is under the cake edges.  
  • Spoon about 1/3 of the frosting onto the first layer.  Use an off-set spatula if you have one.  Spread evenly to the very edge of the cake.  
  • As a rule, I don’t try to swirl the frosting in any pattern until I have the entire cake completely frosted.  Get it evenly spread, and then use your knife to make whatever pattern you wish.  If you are really trying to do a fancy pattern, it’s best to frost in two steps.  First a crumb coat, which is a thin layer of frosting which completely seals the cake, and then is place in the refrigerator until it set.  Then the remaining frosting is spread into whatever effect you are looking for. 
  • Place the second layer of the cake upside down on the frosting. 
  • Spread frosting in sections, up the sides of the cake.  Then put the remaining frosting on the top, and spread evenly on the pushing the frosting to the edge.
Saturday
Sep152012

Ginger Chocolate Spice Cookies

This is the classic, chewy, crackly cookie recipe everyone knows and loves, though my version has both clove and nutmeg in it as well.  One year, I experimented by adding just a little bit of cocoa and I was very pleased with the results. 

If you want the classic, just eliminate the cocoa and use the full two cups of flour. 

I usually make this dough in advance and chill it.  Once chilled, I roll it out into balls and then bake.  I have also kept the raw cookie balls in a bag in the freezer and rolled out a few at a time when needed. 

I struggled with this recipe for years.  They kept coming out like little cakes.  Until I found Alice Medrich's book and realized I had mistakenly written down baking powder instead of baking soda. 

Ingredients

2 cups flour, less 2 tbs
¼ cup cocoa powder
1 tsp ground ginger
1 tsp baking soda
1 tsp ground cinnamon
½ tsp ground cloves
¼ tsp ground nutmeg
¼ tsp salt
1 stick unsalted butter
½ cup granulated sugar
½ cup brown sugar, lightly packed
2 eggs
¼ cup molasses
¾ cup coarse sugar (for coating)

  • In a large bowl, sift together the dry ingredients.  This is especially important for the cocoa, which tends to form hard little nuggets that need to be broken down.
  •  Melt the butter.  In a small bowl, combine the melted butter, the granulated and brown sugar, eggs, and molasses.  
  • Add the wet ingredients to the dry.  Incorporate with a wooden spoon or spatula until you can no longer see any of the dry ingredients.
  • Refrigerate the dough for an hour, or overnight.   If the dough is too hard to scoop, you will need to bring it to a chilly room temperature.
  • Preheat the oven to 350.  If you want to bake both cookie sheets at the same time, position the racks to the upper and lower thirds of the oven, and rotate them halfway through the baking cycle.  Alternately, a convection oven will eliminate this step, or if you have a conventional oven, bake one sheet at a time.  With this short a baking cycle, it won’t take much longer.
  • Scoop the dough into balls with either a No. 50 ice cream scoop for smaller cookies (1 ½ inches), or a No. 24 for larger cookies (2 ½ inches).  Alternately, use a tablespoon of dough for the smaller cookies, and slightly less than 2 tbs of dough for the larger cookies.
  • Roll the balls in the coarse sugar and place on a cookie sheet 2 inches apart.  Bake 8-10 minutes for the smaller cookies, 10-12 minutes for the larger cookies, or until they puff up, crack and then deflate.  (Alice Medrich says, “For chewier cookies, remove them from the oven when at least half of the cookies have begun to deflate; for crunchier edges with chewy centers, bake a minute or two longer.
  • Remove the sheets to a rack, and allow to cool only a minute or two.  With a metal spatula, remove the cookies directly on to the rack and allow to cool completely.   These cookies hold a long time stacked in an airtight container, but they usually don’t last very long at our house.
Sunday
Jul012012

Grilled Swordfish

When the Block Island swordfish is running at this time of year, there is nothing better.  I usually prepare Swordfish two ways:  grilled and served on a soft roll with homemade tartar sauce, or grilled and service with a simple butter, garlic and lemon sauce.  

Grill it the same, either way.

For the Fish:

Fresh caught, wild swordfish, ½ steak per person, usually cut 1 to 1-1/2 inches thick
½ stick unsalted butter, melted
Salt and Pepper
Grill Plate for the Grill 

  • Trim the fish of all the skin and bloodline.  If you like the belly flap, toothpick it to the loin section for even cooking.  Salt and pepper the steaks and pour the melted butter over the fish.  Store in the refrigerator until you are ready to grill.  The butter will harden on the fish.  You want that.
  • Preheat your gas grill, or get your charcoal grill up to its highest temperature, with the grill plate on the grates. 
  • Being careful to leave the butter on the steak, flip the steaks onto the grill plate butter side down.  Once you have placed the steaks on the grill, do not attempt to move them.  Sear the steaks for at least 4 minutes, or until the fish is seared and lifts easily off the grill plate.  Don’t make the mistake of trying to flip your fish too soon, and loosing much of it to the grill.
  • Flip the steaks, and then scrape the remaining butter out of the dish and spread it on top of the steaks.  Grill another 4 minutes. 
  • Remove the steaks to a clean dish, and cover lightly with foil to rest, while you eat your salad.  About 10 minutes.  This will steam the fish so that it is cooked completely through, yet retain a crisp crust on the outside.
  • Serve hot either on a toasted roll with Homemade Tartar Sauce, or with the Butter, Garlic and Lemon Sauce, and your favorite vegetable of the summer. 

Homemade Tartar

Chop three whole kosher dill pickles very fine, and sieve or squeeze out the liquid.  Mix with ½ cup or more good quality mayonnaise, such as Hellman’s.

Butter, Garlic and Lemon Sauce

Heat 4 Tbs unsalted butter in a small sauce pan.   When the butter starts to sizzle, add two cloves garlic, sliced or minced and allow to turn just golden, then immediately add the juice of a half lemon and remove from the heat.  Pour this over the fish for serving.

Saturday
Jun022012

The White House Maryland Crab Cakes

I got this recipe for Maryland Style Crab Cakes from an old White House cookbook someone loaned me.  The recipe calls for a white sauce which makes a more stable binder, unlike prepared mayonnaise, which breaks down and gets greasy when cooked. 

Use the best fresh picked crab meat you can find, and handle it as little as possible to keep the it from becoming tough.  I don’t make this with anything that comes out of can.  

I make the sauce a day in advance and refrigerate for convenience and ease of handling, just pat any condensation dry with a paper towel before proceeding.  I also make the crab cakes several hours earlier, and then sauté right from the refrigerator.  You should get about 14 crab cakes, and two would make a meal.

Binder Sauce   

2 Tbs unsalted butter
1 Tbs minced shallots
2 garlic cloves, minced
4 Tbs flour
1 cup milk
1 egg, slightly beaten
2 Tbs lemon fresh squeezed lemon juice
1 tsp Dijon prepared mustard
1 tsp Tabasco Sauce                 
1 Tbs Worcester sauce
1 tsp Old Bay seasoning

For the crab cakes:

1 lb jumbo lump crab meat
1 lb back fin crab meat
2 cups panko or homemade soft breadcrumbs
Butter for sauteing

One Day in Advance, Make the Sauce

  • In a small saucepan, melt the butter, and sauté the shallots and garlic until translucent.  Add the flour and stir, letting the roué bubble for a few minutes, but don’t let brown.
  • Add the hot milk and whisk.  Remove the pan from the heat for this step, and while whisking, drizzle in the beaten egg, being careful not let the egg scramble at the bottom of the hot pan. 
  • Add the lemon juice, dry mustard, Tabasco, Worcester and Old Bay seasoning and whisk.  Let the sauce cool, or refrigerate until ready to mix the crab cakes. 

Make the Crab Cakes:

  • In a medium bowl, gently pick over crab meat, feeling for shell pieces, but not breaking up the lumps.
  • Add the sauce and with a rubber spatula, very gently fold ALMOST all of the sauce in until just combined.  Hold back about 1/3 cup of the binder sauce.  It’s just a little too much sauce for this much crab, but it’s easier than trying to scale down the recipe.
  • Spread the breadcrumbs in a shallow bowl.  Use a 1/3 cup measure and scoop the crab meat into it, pressing slightly into the cup.  Gently drop the crab meat into the breadcrumbs. 
  • With your hands, toss the breadcrumbs around the sides and over the crab meat.  With your hands, gently pick up the cake, and pat slightly to shape and hold the crumbs in place.  Place on a plate or baking tray, cover and refrigerate until ready to cook.
  • Melt the butter in a non-stick pan until it bubbles.  Gently place the crab cakes in the pan, about 6 to a 11-12 inch pan.  If you crowd then, you will have trouble flipping them without breaking them.  Using two spatulas, gently flip the cakes until they are slightly more than golden brown on each side.


Sunday
Jan222012

Chicken Cacciatore

This is my take on the classic "hunters chicken" recipe from Tuscany.  Since I am a fan of cooking chicken on the bone, but not fighting with the bones once it's cooked, have added a couple of extra steps to the classic recipe for Chicken Cacciatore.  

A little more time, but you don't want your guests fighting with their food, do you?

For the chicken:

4-6 Split, bone-in, skin on, chicken breasts
2-4 Bone-in, skin on, chicken thighs
1 cup flour
1 tps salt
½ tps ground pepper
Olive Oil for Browning
¼ lb thick cut smoked bacon, diced

For the vegetables:

4 cloves garlic, minced
4 sweet onions, diced
4 red or green frying peppers, cut in ½ inch pieces
1 lb fresh mushrooms, thickly sliced  (optional)

For the seasoning:

1 tsp kosher salt and ½ tsp fresh ground pepper
1 Tbs each Dried Italian Seasoning (oregano, basil, marjoram, rosemary, savory)
Pinch crushed red pepper flakes

For the Braising Liquid:

2 cups Hearty Burgundy Red Wine
2 28 oz cans crushed tomatoes (not with added puree)
(I use fresh crushed when I can get them at the farmers market)
2 Bay Leaves

Brown the chicken:

  • Combine the flour, salt & pepper in a large flat dish.   
  • Heat a large Dutch oven with the Olive Oil.  
  • Dredge the chicken, shake off excess, and brown, meat side down, until very golden.  
  • Turn, brown again, and set the browned chicken aside in a bowl while you finish browning the other pieces.  (Chicken will not be cooked through)

Caramelize the vegetables:

  • Add the bacon to the pan and cook until just starting to crisp.  
  • Add the garlic and the red pepper, and sauté for one minute, then immediately add the onions and stir to get the garlic off the bottom of the pan.  
  • Cook the onions until they soften and start to brown, and then add the peppers.  
  • Cook the vegetables until they begin to caramelize. 

Season:

  • When the vegetables start to stick, season with salt & pepper, and the dried herbs.  
  • Let the herbs salute with the vegetables for a minute or two.

Add the braising liquid:

  • Add the wine, and let it cook in the vegetables for a few minutes, until it starts to bubble.  
  • Then add the tomatoes and stir together.  
  • Once the tomatoes start to bubble, add the chicken, and turn the heat down to a simmer.  
  • It should just bubble slowly
  • Check to see that the chicken gets turned carefully in the sauce to keep it covered.  This will take about 1 to 1-1/2. 

Prepare for storage/serving

  • In about 1 hour, check the chicken to see if it is starting to falling off the bone. 
  • Remove the chicken from the pot.  
  • When it is cool enough to handle pull the chicken meat off the bones and set aside. 
  • At this point, you can allow the sauce to cook down a little more by turning up the heat and letting it boil.  
  • You can also refrigerate the sauce and the meat separately overnight. 

Serving:

  • When you want to serve, skim the fat off of the sauce, return the meat to the sauce, and allow it to simmer another 15-30 minutes, depending on how tender you want your chicken.
  • Serve over angel hair pasta or with a great loaf of Italian bread and a generous sprinkle of parmesan cheese.  
  • Enjoy with a glass of Chianti, which is the classic wine of Tuscany.
Monday
Jan022012

Fusilli a la Vodka Sauce

Why anyone would spend $7.95 for a jar of “kicked up” vodka sauce, when this one is so easy to make is beyond me.  Just a few items from the fridge and pantry that can be wisked together before the water for the pasta even boils. 

I’ve often added cooked shrimp or lobster to the sauce which makes it a very special dish.  Just let the sauce heat the fish through.

Ingredients for One Pound of Pasta

4 Tbs unsalted butter
2-3 dried red chilies
½ can tomato paste
3-4 Tbs water
1 ½ ounce vodka
1 ½ ounce whisky, cognac, bourbon, or scotch
1 cup heavy cream
1-2 cups grated parmesan cheese, to taste
1  lb fusilli (any short shape will do, penne also works), prepared according to package directions.

  • In a small saucepan, melt the butter.  Break the chilies in half and add to the butter.  Alternately, you can use crushed red chili flakes, if you don’t mind the flakes in the sauce.  Let this simmer for 1-2 minutes on low.
  • In the meantime, mix the tomato paste with the hot water to loosen it a bit.  Then add this to the butter and chilies and let it simmer another 1-2 minutes.
  • Take out the chilies if you wish at this point.  Add the alcohol and allow the fumes to cook off for a minute.
  • Add the cream and bring the mixture to a scald stage.
  • Add in the grated cheese and let this simmer until the cheese melts into the sauce and it becomes very smooth.
  • I rarely add any additional salt or pepper as the cheese provides a lot of salt, and the chilies provide the heat.
  • Pour the sauce over the hot pasta and serve immediately.
Monday
Jan022012

Quiche (Sans the Lorraine)

Chris prefers Ham for his Quiche, and we sometimes make a Spinach one for those vegetarians out there.  I prefer the classic Quiche Lorraine I learned to make from the Joy of Cooking.  So, this recipe is a combination of Chris’s tried and true ingredients, and my methodology. 

For Each Quiche:

1 prepared pie shell (frozen or home made, your choice)
1/2 lb Swiss Cheese, shredded
1/4 lb Jarlsburg Cheese, shredded
1/4 lb Guryere, shredded
2 eggs, whisked
1 cup heavy cream
Pinch Salt, White Pepper, Nutmeg

Optional Ingredients:

½ package frozen chopped spinach, drained and squeezed of the liquid
½ lb chopped ham
½ lb bacon, diced and rendered until crispy, and ½ finely chopped onion
1 cup chopped sweet onions (usually combined with the bacon), but you can use it with the ham and/or spinach.

  • Preheat the oven to 350 degrees.
  • Mix the cheese with the Optional Ingredients of your choice and place it in the pie shells.
  • In a sauce pan, scald the cream.  Remove the pan from the heat and while stirring the cream, slowly pour in the wisked eggs, being careful not to let the eggs scramble when they hit the bottom of the pan.
  • Add the Salt, Pepper and Nutmeg to the cream and eggs.
  • Pour the cream and egg mixture into the pie shell to cover the filling.
  • Carefully move the pies to the pre-heated oven and bake until the center of the filling is firm to th the touch, about 45 minutes, depending on how full your crust ended up.
  • Remove from the oven and allow to cool slightly before serving. 
  • Alternately, cool completely,  wrap in plastic and then foil and refridgerate until ready to serve.  Warm slightly in a 300 degree oven before serving. 

Chris claims these don’t freeze well, but I disagree.  Not that we ever have any leftover to freeze anyway.

Monday
Dec192011

Lasagna Bolonase with Ragu Sauce

The meat used for this sauce varies from family to family.  Use what you like, but do try to use equal portions of three different types of meat. Pork, Beef, Veal, Turkey, Venison, Chicken, Duck.  Doesn't matter.  I have historically made with with Duck, Pork and Veal, but since moving back to Italianland, I've found it necessary to switch to the more traditional beef, pork and turkey, and increasing the amount of tomato in the sauce so that it is recognizable to my family.

The groups of ingredients in this recipe are to be added slowly, with cooking time in between, to allow each ingredient to develop its own flavor.  Adding them all at once will just give you stew, not Ragu.

This recipe takes a good two hours to make properly, but you can make it a couple of days in in advance, or freeze it for up to three months.  Once you have the sauce made, the Lasagna is simple to put together.  You can even make the Bechemel Sauce a couple of days in advance and throw all of the cold ingredients together, then either bake or freeze.  The Lasagna itself needs to be room temperature and then takes a good two hours of cook and rest time, so plan accordingly, depending on the size of your pan.  For my Christmas Dinner, my pan is about 12x18x3 inches, so it will take all of that time to bake and set.

Ingredients:

1 stick unsalted butter
¼ lb smoky bacon, diced
2 medium sweet onions
1 lb ground duck breast, or duck sausage, casings removed
1 lb ground veal, or mild veal sausage, casings removed
1 lb ground pork
1 oz dried porcini mushrooms
4 cloves garlic, chopped
1 teaspoon fresh thyme
1 teaspoon fresh oregano
1 teaspoon fresh marjoram
½ teaspoon fresh rosemary
Salt & Pepper to taste
1 can tomato paste
1 28 oz can crushed tomatoes (I use Cento)
1 cup brown meat stock (preferably home made)
1 cup red wine
Scant ¼ cup cream
1 lb cooked pasta, preferably penne or fusilli or,
2-4 boxes no-cook pasta sheets (for the Lasagna)
1/2-1 recipe Bechemel Sauce (see below)

  • Chop the mushrooms, and soak them in 1-cup warm water until very soft.  Drain the mushrooms and add the liquid to the brown stock.
  • Mix the tomato paste with the red wine.
  • In a large Dutch oven, melt about half the butter; sauté the bacon bits until completely rendered.
  • Add the ground meat and brown evenly, until carmelization starts. This should take about 20 minutes. If you don’t have a big sauté pan, work in batches, adding a little more butter, so that the meat actually browns and doesn’t steam.  Remove the meat from the pan into a bowl and set aside.
  • Add what's left of the butter to the pan and when it is melted, add the garlic, and sauté for one minute (make sure your onions are ready to go in, or you may burn the garlic)  Add the onions and stir, making sure to get the garlic off the bottom of the pan.  Saute until they begin to carmelize.  Then add the chopped herbs and sauté another one or two minutes.
  • Add the cooked meat and the mushrooms back to the pan and combine. 
  • Sprinkle the mixture with the salt, pepper, before proceeding to the next step.
  • If you want a little more traditional sauce, add the 28 oz can of good quality crushed tomatoes at this stage, and allow it to reduce somewhat.
  • Alternate adding ½ of each of the liquids to the pan, (mushroom/stock, wine/paste) simmering between additions until the liquid is reduced and starting to thicken.  This process should take about 45 minutes. 
  • Add the cream to the sauce, and heat through.  Taste and adjust for seasoning.  Keep warm while pasta cooks.  Take care not to reduce too much after the cream is added.
  • Bring 6 quarts water to a boil.  Add 1-teaspoon salt.  Add 1 lb pasta and bring to a boil.  Cook for 7-8 minutes from the boil, until pasta is al dente.  Drain.  Do not rinse.  (Never rinse pasta.  The sauce sticks better to the starch.)
  • Ladle generous portions of the sauce over the pasta.  Add cheese if desired, but I would caution against it.  I love Pecorino or Reggiano on almost everything, but I prefer this sauce without it.
  • For the Lasagna, ladel a little sauce in the bottom of your pan, just enough to cover the bottom, then layer the pasta sheets, breaking and fitting them as necessary. 
  • Add another layer of sauce and then a layer of the Bechemel Sauce, and repeat until the pan is full.  Press down on the layers to fit lots of them in the pan (my pan is a good 3 inches deep), and I like to squeese in at least six layers, so use your sauces judiciously).
  • Sprinkle with a little fontina cheese or some additional parmasean on the top if you wish.
  • If you are making the Lasagna in advance, let it come to room temperature before baking.
  • Bake in a 350 degree over, lightly covered with foil, until the entire pan is bubbling all the way through the center, about 60 minutes, but check it at about 45 minutes.
  • Remove the foil and continue baking for another 15-20 minutes until the top starts to crust over.
  • Remove the Lasagna from the oven and allow it to rest for about 15 minutes before you attempt to cut it.

Bechemel Sauce

This is a Tuscan style Lasagna, which eliminates the ricotta and the mozzarella of the Southern Italian style of cooking.  Neither cheese is my favorite, and I prefer my Lasagna with lots more layers of pasta, than thick layers and lumps of cheese.  If you have ever had Pastistio, a Greek style Lasagna, this is rather more like that in style and uses a similar Bechemel, Meat Sauce and Pasta Layer together.  There is a ratio of ingredients here which can be reduced or increased accordingly, but this is the classic "white" or "mother" sauce found everywhere.  Depending on how much Lasagna you are making, you may have some sauce left over.  Pour it over pasta shapes and bake it for a light mac & cheese, or over blanched broccoli or other vegetable and bake it for au gratin.  A little buttered bread crumb on top wouldn't hurt either.

4 TBS Butter
4 TBS Flour
4 cups whole milk
Pinch ground nutmeg
Salt & Pepper
2-4 cups grated parmesan cheese

  • In a large sauce pan, melt the butter.
  • When it is melted and begins to foam, add the flour and whisk into a paste.
  • Allow the paste (or roue) to cook for about 2 minutes, whisking the entire time.  You want to cook the flour, but not brown it.
  • Add the milk and bring to a slow boil, until the sauce thickens into something a little less than pudding.
  • Add 2 cups of the grated cheese and stir until the cheese is melted. 
  • Add the nutmeg.
  • Taste it.   This is the only cheese in your Lasagna, unless you choose to add in some shredded fontina between the layer, which is another choice.  If it is cheesy enough, add salt and pepper to taste.  If it is not, add some additional cheese until you get the taste you want, and then add more salt & pepper.  Remember, cheese has a lot of salt in it, so salt last, not first.
  • Allow the sauce to cool completely before using.  I typically make mine a day or two in advance of using it, and store it in the refridgerator (but don't freeze it).
Sunday
Dec182011

Walnut Shortbread Christmas Cookies

When I was growing up, this cookie was a mainstay in my family.  In fact, I thought they invented it. 

Turns out, this is one of the oldest and most popular cookie recipes, turning up in nearly every culture.  Just under a different name.  Russian Tea Cakes.  Mexican Wedding Cakes.  All that varies is the flavorings and the type of nut.  

I do think my family thought to decorate them for Christmas with the red and the green sugar. 

Makes about 2 dozen

Ingredients:

2 cups flour
½ tsp salt
½ cup sugar
2 tablespoons ice water (depending on the season)
2 sticks butter, softened
1 cup walnuts
1 teaspoon pure vanilla extract
1 teaspoon pure rum extract (or dark rum)
½ cup confectioners sugar
Red & Green sugar crystals

  • Pre-heat the oven to 350 degrees.
  • Place the nuts in the bowl of your food processor, and chop until you have a very fine crumb, but just short of nut butter.
  • In a stand mixer with the paddle, cream the butter.  Add the sugar and beat until light and fluffy
  • Add rum and vanilla and beat. 
  • Add the nuts to the butter and sugar mixture and combine thoroughly.
  • Sift the flour and salt together into a separate bowl.
  • Add the flour to butter mixture, and gently incorporate. 
  • If the dough it very stiff, add ice water, and the paddle another couple of turns.
  • With your hands, or a very small ice-cream scoop, roll into balls about 1 inch in diameter, and place on a cookie sheet, about one inch apart.
  • Bake in 350 oven for 20 minutes.
  • As soon as they come out of the oven, slide them onto a rack and sift confectioner’s sugar over the cookies until you have a fairly heavy coating (yes, it makes a mess, but its faster than rolling each cookie by hand into a bowl of confectioner's suger)
  • Sprinkle with red or green sugar crystals.
Sunday
Oct092011

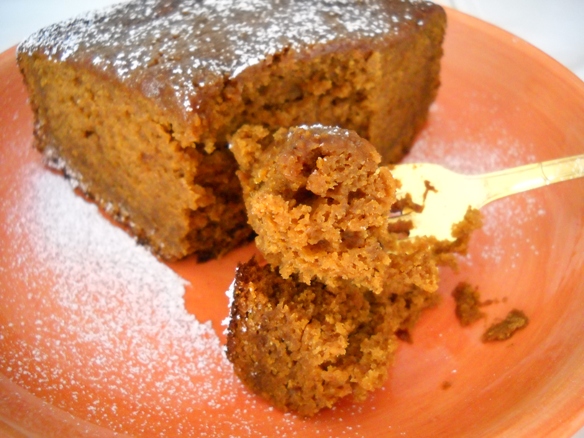
Pumpkin Gingerbread Cake

I wanted pumpkin.  I wanted Gingerbread.  I wanted both.  This cake really did hit the mark for a Fall Dessert, on Columbus Day Weekend with house guests. 

I found this recipe on a web site called Very Best Baking.  When I saw that the ingredients called for a juice box, whipped topping and only baking soda,  I almost clicked away.  But then I decided to alter it enough to use real ingredients and the result was pretty sensational. 

Ingredients:

2 ½ cups all purpose flour
1 ½ tsp baking soda
1 ½ tsp baking powder
1 tsp ground cinnamon
1 tsp ground ginger
¼ tsp ground cloves
¼ tsp ground nutmeg
1 cup orange juice
2/3 cup unsulphured molasses
¾ cup sugar
½ cup butter softened
1 cup pumpkin puree
1 large egg
Whipped Cream, optional

  • Preheat the oven to 350 degrees.  Butter and flour a single 9” cake pan
  • In a medium bowl, combine the flour, baking powder, baking soda, cinnamon, ginger, cloves, nutmeg and salt.
  • In a large (2 cup) measuring cup, pour in the orange juice to one cup.  Then pour in the molasses until the liquid measures 1 and 2/3 cups.  Mix and set aside.
  • Cream the butter with the sugar until it starts to turn fluffy. 
  • Add the pumpkin and beat.  Add the egg and beat.
  • Add 1/3 of the dry mixture and beat until just combined.  Then add ½ of the juice mixture and beat until just combined.  Add another 1/3 of the dry and combine, followed by the remaining juice, then the final 1/3 dry ingredients.  Beat only until it is just combined.
  • Pour into the prepared cake pan.  Bake for approximately 50 minutes, until a toothpick comes out clean.
  • Remove to a rack and cool in the pan for about 10 minutes, then remove from the pan and allow to cool on the rack completely.
  • Sprinkle with confectioner’s sugar if desired, and serve with either whipped cream or ice cream.
Sunday
Oct092011

Coq Au Vin (Wine Braised Chicken)

This recipe is Julia Childs original list of ingredients, but adapted to my own braising method.   If you watched Julie and Julia, you understand how complex many of the recipes from Mastering the Art of French Cooking can be.  They don't need to.

I pretty much do all of my braises the same exact way, regardless of what the recipe says. The real secret to any braise is simple:  take time to carmelize your vegetables and use homemade stock.

Ingredients

4 ounces bacon, diced
2 Tbs unsalted butter
3 lbs chicken, cut up (your choice, all parts work great)
½ tsp salt
½ tsp pepper
¼ cup cognac
3 cups young, full bodied red wine
2 cups chicken stock
½ can tomato paste
2 cloves garlic, minced
1 tsp thyme leaves
1 bay leaf
2 large sweet onions, diced
½ lbs mushrooms, wiped clean and sliced thick
3 Tbs flour
2 Tbs softened butter
Fresh Parsley

  • Season the chicken parts with salt and pepper.  In a large deep frying pan or large dutch oven, render the bacon until it is crispy.  Remove from pan and set aside in a large bowl.
  • Brown the ckicken skin side down, making sure to keep plenty of room between the pieces so that they actually brown, not steam.  You don’t need to cook the chicken all the way through, it will finish cooking in the braising liquid.  Once the chicken parts are browned, remove them to the bowl.
  • Add 1 Tbs butter to the pan, and when it begins to sizzle, add the mushrooms.  Saute them until they color and release some of their liquid, then remove them from the pan to the bowl.
  • Add the other 1 Tbs butter and when it is sizzling, add the garlic and sauté for one minute.  
  • Add the onions.  When the onions begin to color, season with a little more salt and pepper and the thyme leaves.  Then allow the onions to completely carmelize until it gets almost to the jam stage.
  • Add the cognac and deglaze the pan.  
  • Add the stock, the wine, and the tomato paste and combine thoroughly in the pan.
  • Add the bacon, the mushrooms and the chicken back to the pan and simmer for about an hour, or until the chicken begins to pull away from the bones.
  • Remove the chicken from the sauce and when it is cool enough to handle, remove all of the meat from the bones.  This will prevent very small bones from falling into the sauce and choking your guests or your husband.
  • While the meat is cooling, combine the remaining soft butter with the flour in a small bowl and with your fingers or a fork, and mash it into a paste.
  • Whisk the paste into the sauce and allow it to come to a slow boil and thicken.  Return the meat to the sauce.
  • The dish can be prepared a day in advance up to this stage.  In fact, I usually plan it that way.  Refrigerate the entire pan once it cools down.  Overnight.
  • The next day, skim the fat from the top of the dish.  Heat the dish through and serve with a good French bagette, spread with unsalted butter and sea salt crystals.